- Create the GlobalPageTop rule.
- Create the productView rule.
- Create the checkOut rule.
- Create the addToCart rule
Create the GlobalPageTop Rule
- Ensure the Adobe Experience Platform Data Collection page with your tag property is open.
- On the left pane, click Rules, as shown:
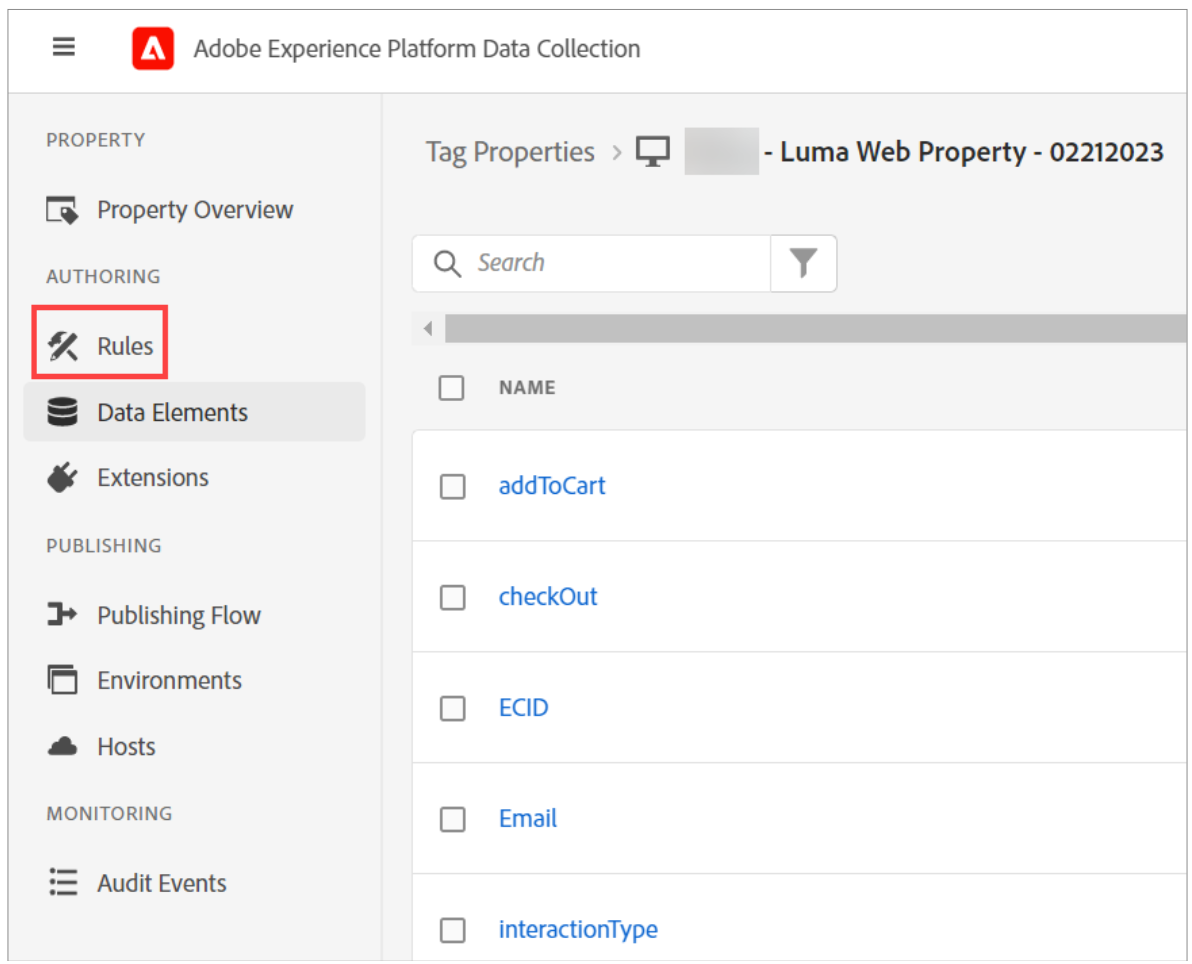 As you have not created any rule yet, a help video opens.
 - Click Create New Rule. The Create Rule page opens.
- In the Name box, type GlobalPageTop.
- In the IF section, under EVENTS, where you will define the event that triggers the rule, click Add, as shown:
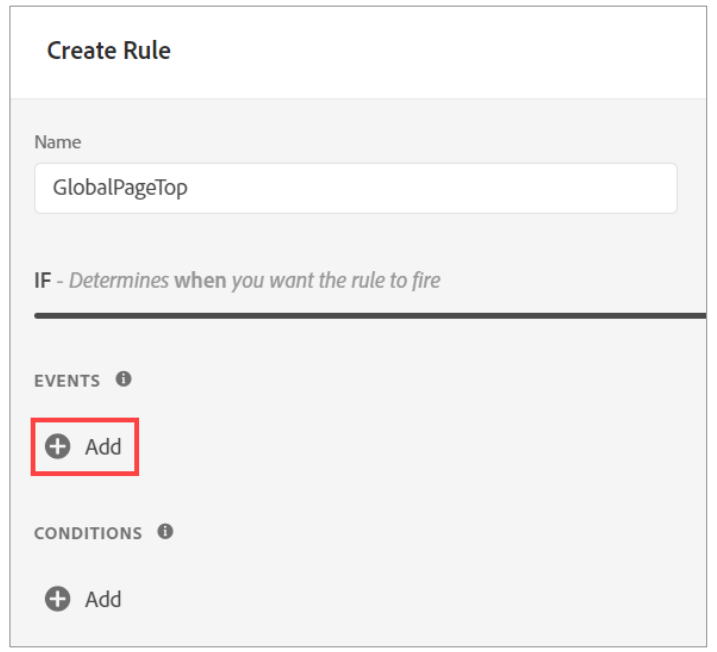 The Event Configuration dialog opens.
 - From the Extension dropdown, ensure Core is selected.
- From the Event Type dropdown, select Library Loaded (Page Top).
- Click Keep Changes. The Create Rule page opens.
- In the THEN section, under ACTIONS, where you will define the rule action, click Add, as shown:
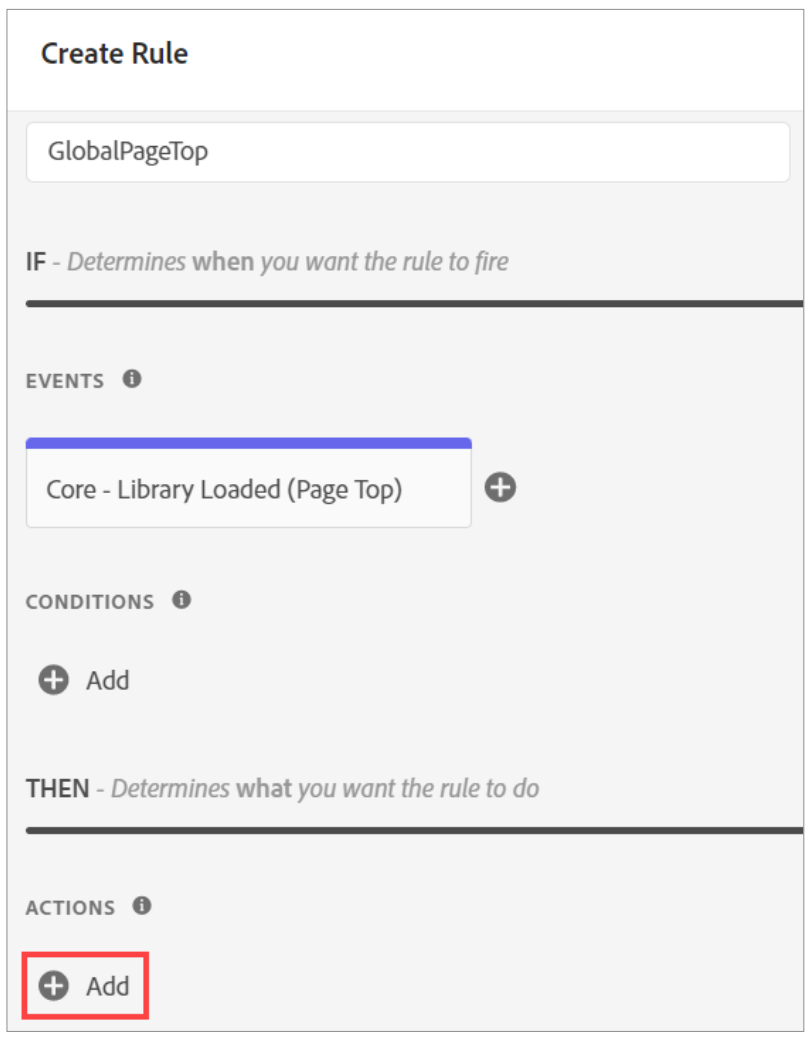 The Action Configuration dialog opens.
 - From the Extension dropdown, select Adobe Experience Platform Web SDK.
- From the Action Type dropdown, select Send event.
- Configure Adobe Experience Platform Data Collection Module 3: Data Collection: Tag ConfigurationPage 57Adobe Copyright Protected12. Expand the ADVANCED OPTIONS section and ensure the Wait to run next action checkbox is selected.
- On the right, in the Type box, type web.webpagedetails.pageViews.
- To update the XDM data box, click the database icon. The Select Data Element dialog opens.
- Click the pageView D ata Element that you created earlier and click Select. The Action Configuration dialog is updated.
- Click Keep Changes. The Create Rule page opens.
- Click Save. The rule is saved and listed on the Rules page.
Create the productView Rule
- Ensure the Rules page is open and click Add Rule. The Create Rule page opens
- In the Name box, type productView.
- In the IF section, under EVENTS, click Add. The Event Configuration dialog opens.
- From the Extension dropdown, select Adobe Client Data Layer.
- From the Event Type dropdown, select Data Pushed. The Data Pushed section opens.
- On the Data Pushed section, under Listen to, select Specific Event, as shown:
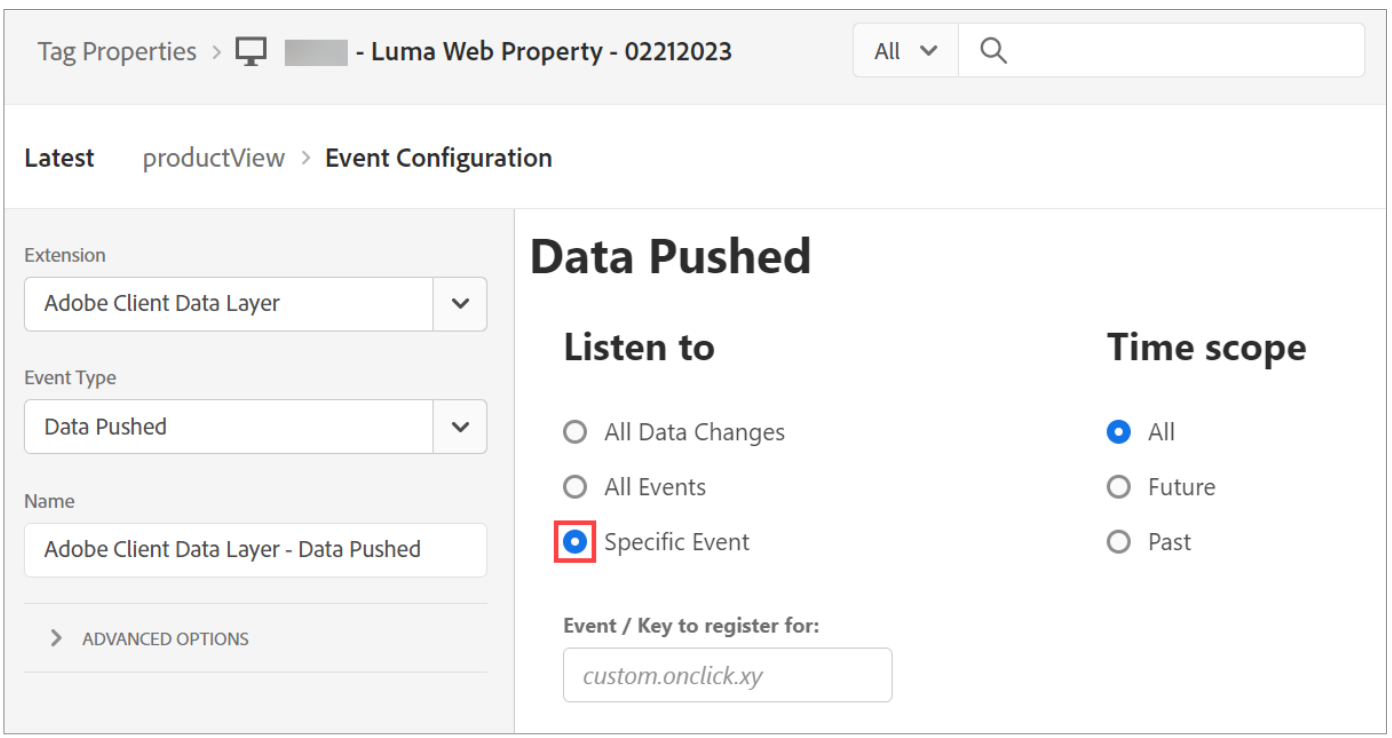
- In the Event / Key to register for box, type productView.
- Under the Time scope section, ensure All is selected.
- Click Keep Changes. The Create Rule page opens.
- In the THEN section, under ACTIONS, click Add. The Action Configuration dialog opens.
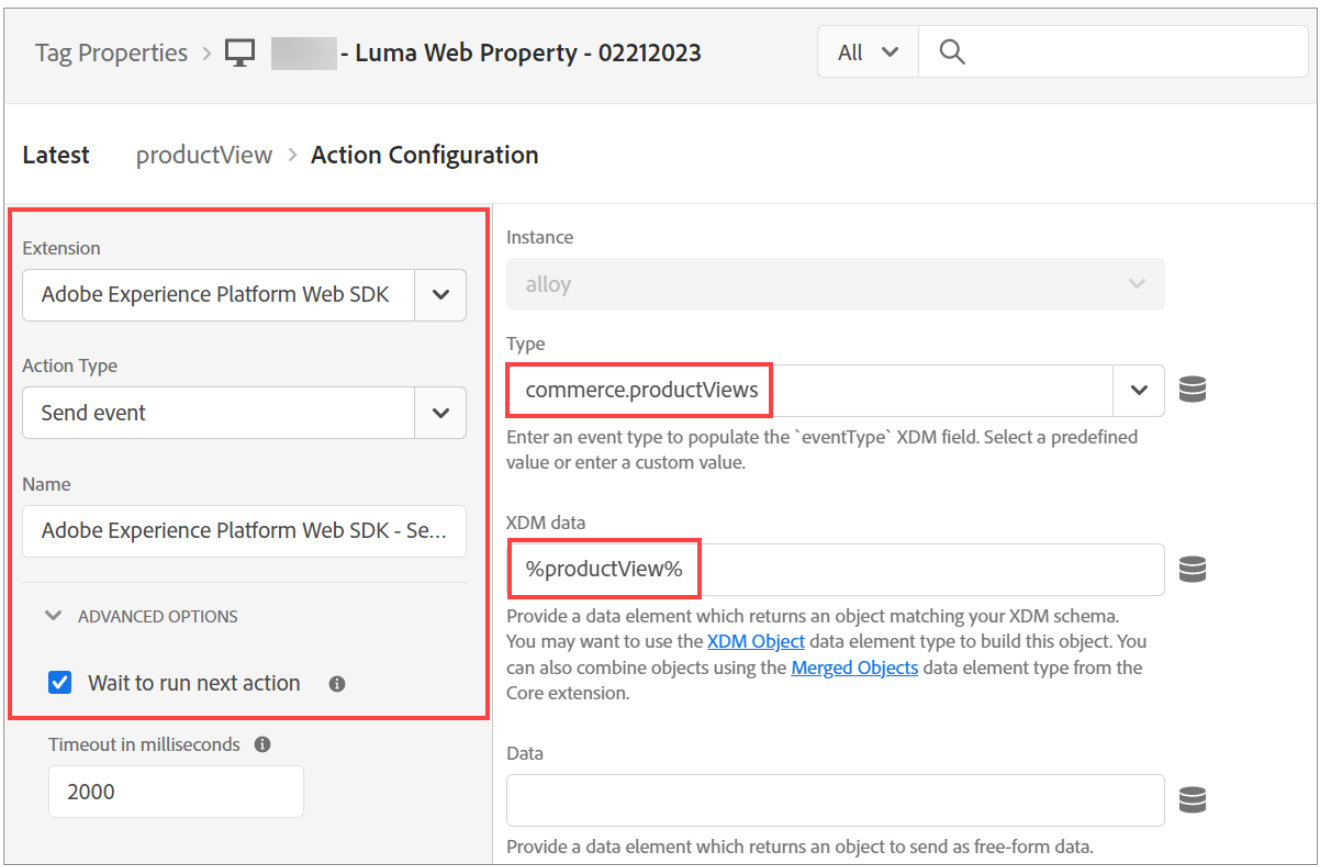
- From the Extension dropdown, select Adobe Experience Platform Web SDK.
- From the Action Type dropdown, select Send Event.
- In the ADVANCED OPTIONS section, ensure the Wait to run next action checkbox is selected.
- In the Type box, type commerce.productViews.
- To update the XDM data box, click the database icon. The Select Data Element dialog opens.
- Select the productView Data Element that you created earlier and click Select. The ActionConfiguration dialog is updated and should look similar to below screenshot:
- Click Keep Changes. The Create Rule page opens.
- Click Save. The rule is saved and listed on the Rules page.
Create the checkOut Rule
- Ensure the Rules page is open and click Add Rule. The Create Rule page opens.
- In the Name box, type checkOut.
- In the IF section, under EVENTS, click Add. The Event Configuration dialog opens.
- From the Extension dropdown, select Adobe Client Data Layer.
- From the Event Type dropdown, select Data Pushed. The Data Pushed section opens.
- On the Data Pushed section, under Listen to, select Specific Event.
- In the Event / Key to register for box, type checkOut.
- Under Time scope, ensure All is selected.
- Click Keep Changes. The Create Rule page opens.
- In the THEN section, under ACTIONS, click Add. The Action Configuration dialog opens.
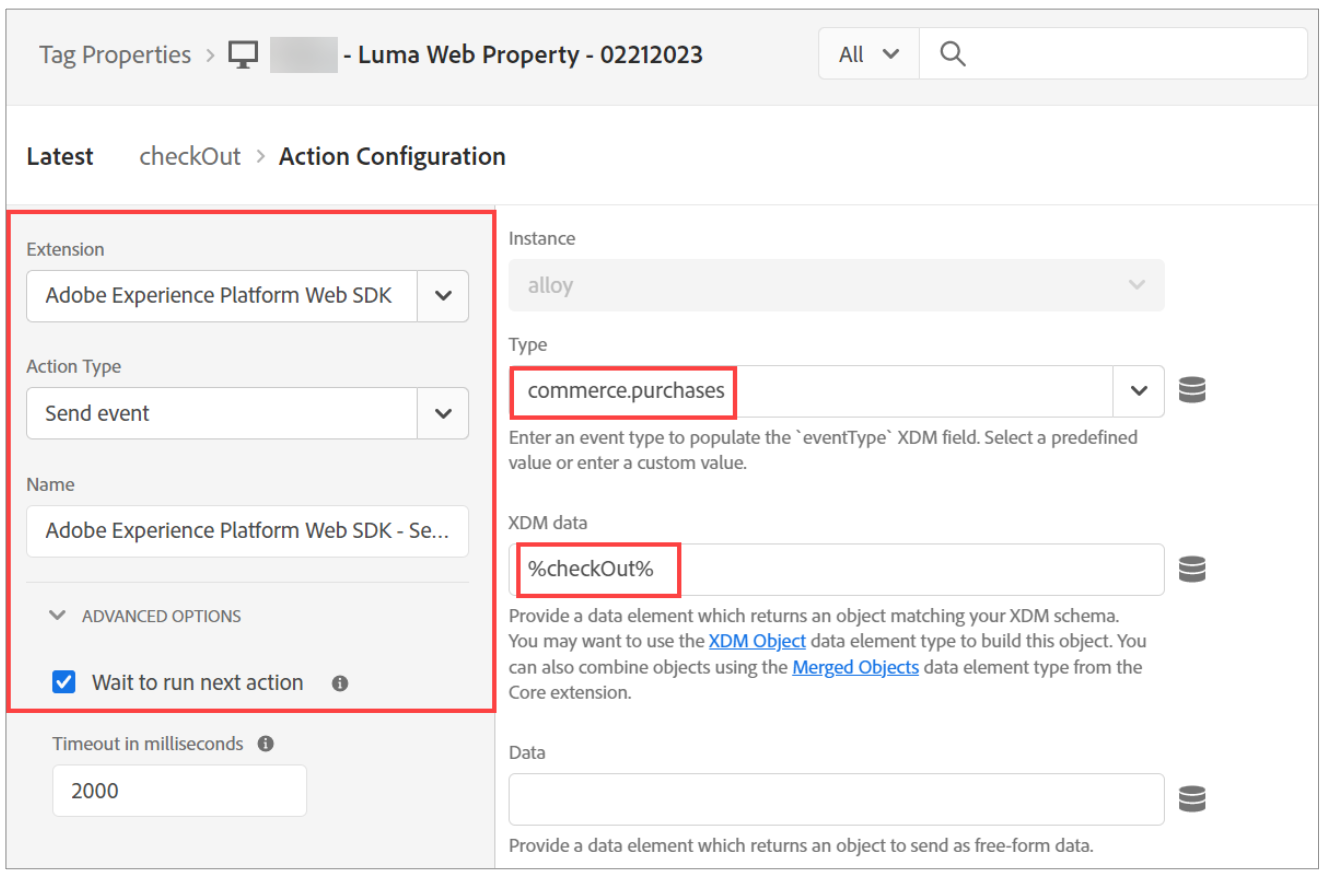
- From the Extension dropdown, select Adobe Experience Platform Web SDK.
- From the Action Type dropdown, select Send event.
- In the ADVANCED OPTIONS section, ensure the Wait to run next action check box is selected.
- In the Type box, type commerce.purchases.
- To update the XDM data box, click the database icon. The Select Data Element dialog opens.
- Click the checkOut Data Element that you created earlier and click Select. The Action Configuration dialog is updated and should look similar to the below screenshot:
- Click Keep Changes. The Create Rule page opens.
- Click Save. The rule is saved and listed on the Rules page.
Create the addToCart Rule
- Ensure the Rules page is open and click Add Rule. The Create Rule page opens.
- In the Name box, type addToCart.
- In the IF section, under EVENTS, click Add. The Event Configuration dialog opens.
- From the Extension dropdown, select Adobe Client Data Layer.
- From the Event Type dropdown, select Data Pushed. The Data Pushed section opens.
- On the Data Pushed section, under Listen to, select Specific Event.
- In the Event / Key to register for box, type addToCart.
- Under Time scope, click All. The Event Configuration dialog appears.
- Click Keep Changes. The Create Rule page opens.
- In the THEN section, under ACTIONS, click Add. The Action Configuration page opens.
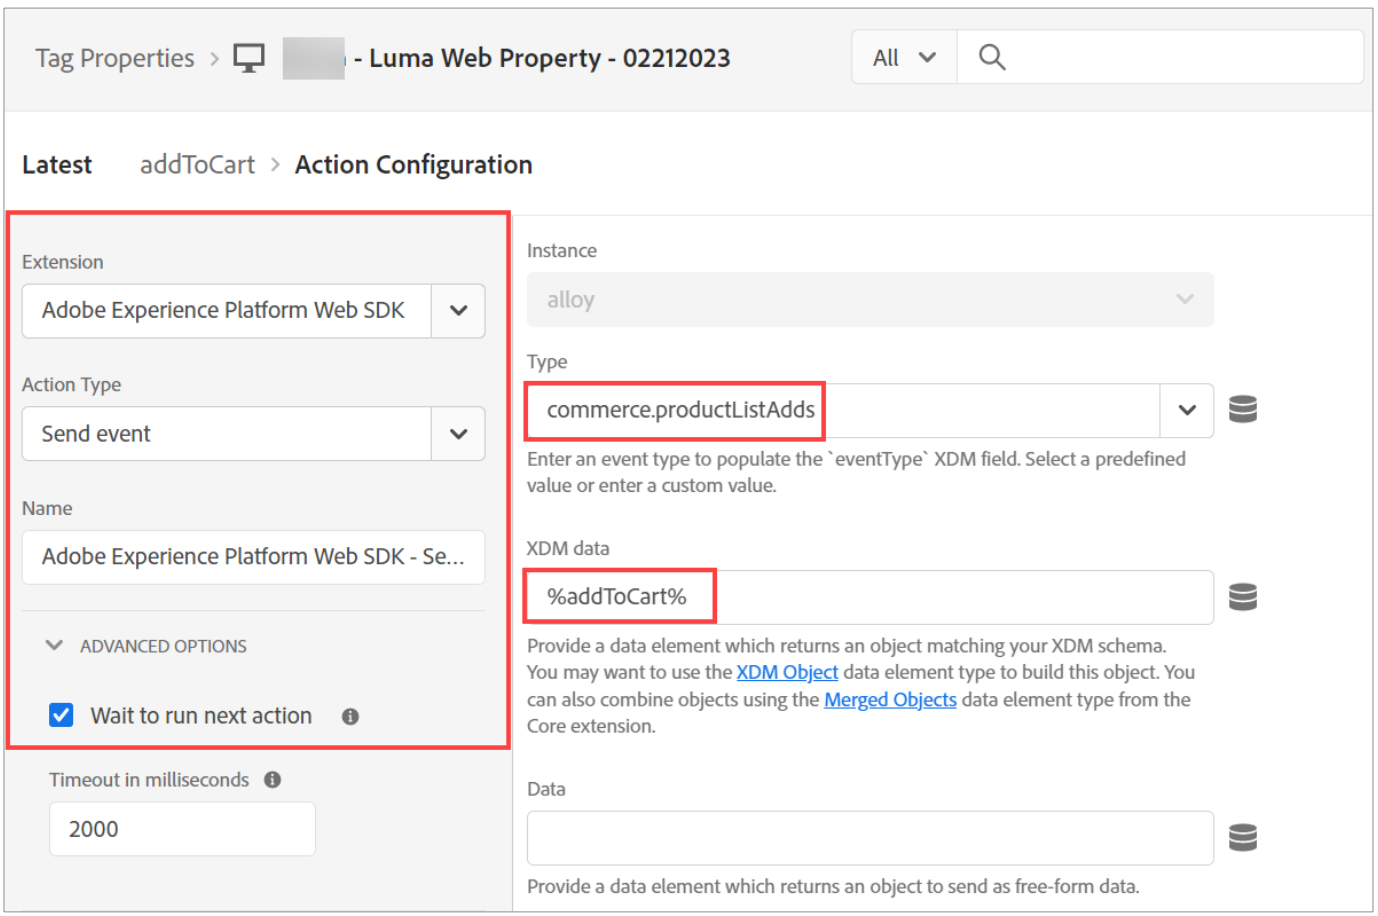
- From the Extension dropdown, select Adobe Experience Platform Web SDK.
- From the Action Type dropdown, select Send event.
- In the ADVANCED OPTIONS section, ensure the Wait to run next action checkbox is selected.
- In the Type box, type commerce.productListAdds.
- To update the XDM data box, click the database icon. The Select Data Element dialog opens.
- Click the addToCart Data Element that you created earlier and click Select. The Action Configuration dialog is updated and should look similar to the below screenshot:
- Click Keep Changes. The Create Rule page opens.
- Click Save. The rule is saved and listed on the Rules page.
