- Create Data Elements using Experience Cloud ID and Data Layer extension.
- Create and configure Data Elements with Web SDK Extension.
Create Data Elements using Experience Cloud ID and Data Layer Extensions
We will create Data Elements within your tag property that map to data collection variables from your website. You will map the D ata Elements to an XDM object that you created in the previous activity.
To create Data Elements within your tag property:
-
Ensure the Adobe Experience Platform Data Collection page is open.
-
On the left pane, click Data Elements, as shown:
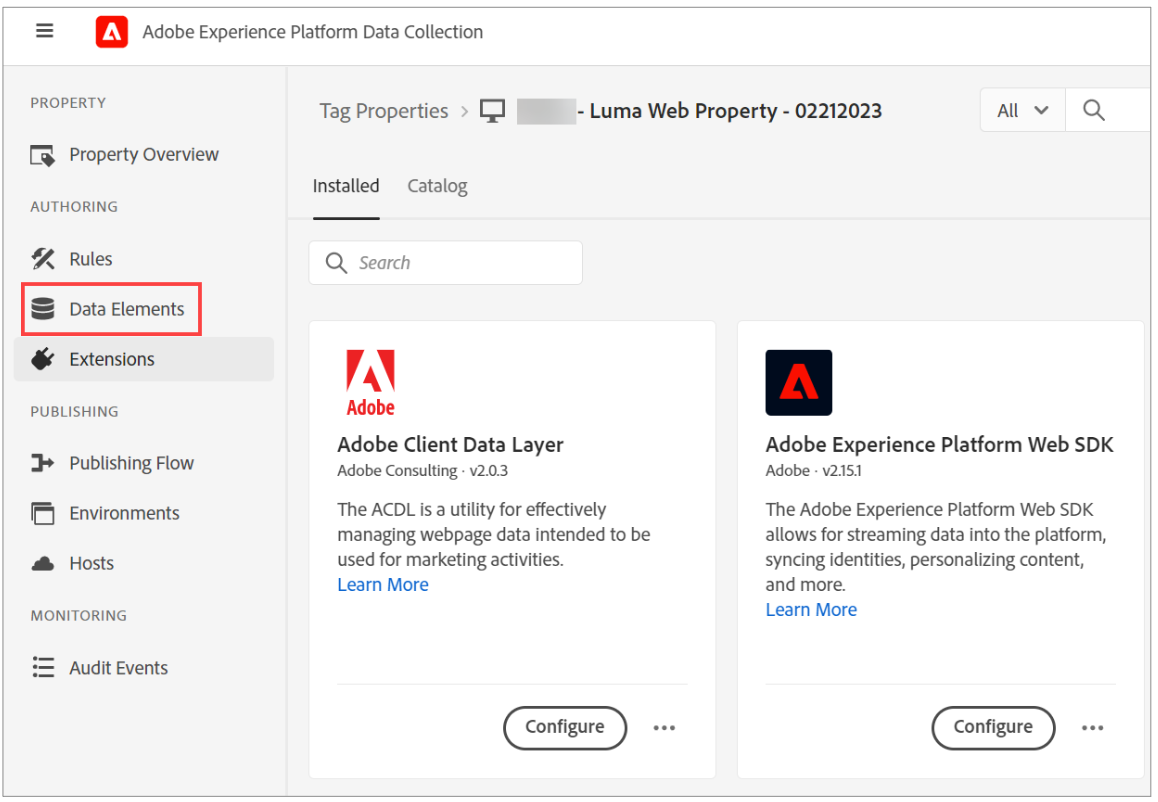 As you have not created any data element yet, a help video opens.
 -
Click Create New Data Element. The Create Data Element dialog opens.
-
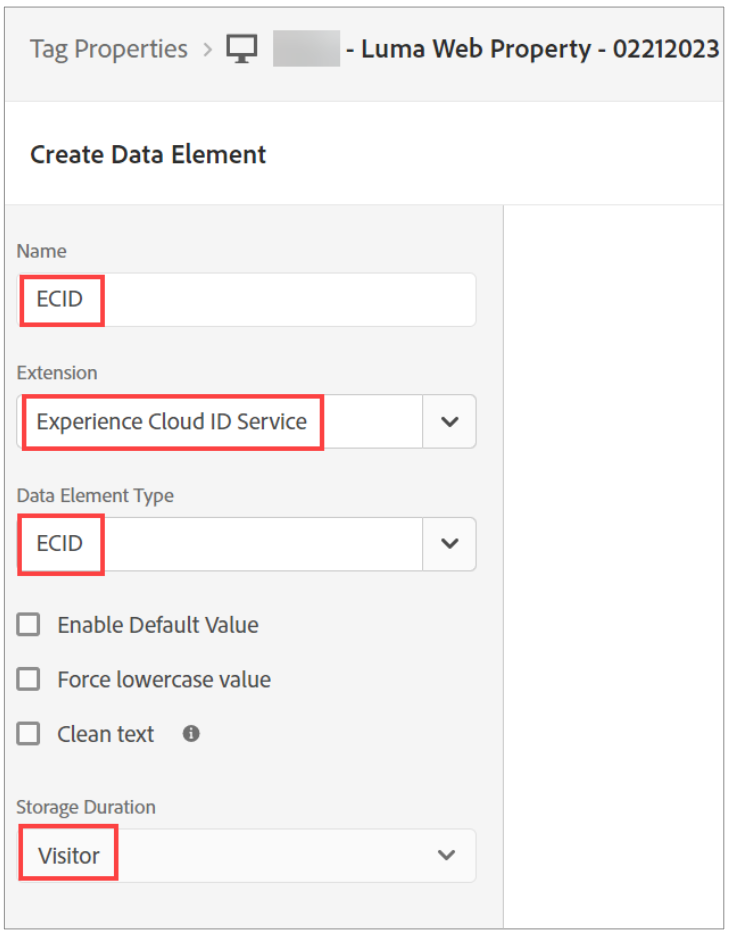
To create an Execution Context ID (ECID) data element, perform the following actions:
- In the Name box, type ECID.
- From the Extension dropdown, select Experience Cloud ID Service.
- From the Data Element Type dropdown, select ECID.
- From the Storage Duration dropdown, select Visitor.
The ECID data element configuration should look similar to the below screenshot, as shown:
-
Click Save. The ECID data element is created and listed on the Data Elements tab, as shown:

To create an Email data element, perform the following:
-
Click Add Data Element. The Create Data Element dialog opens.
-
Perform the following actions:
-
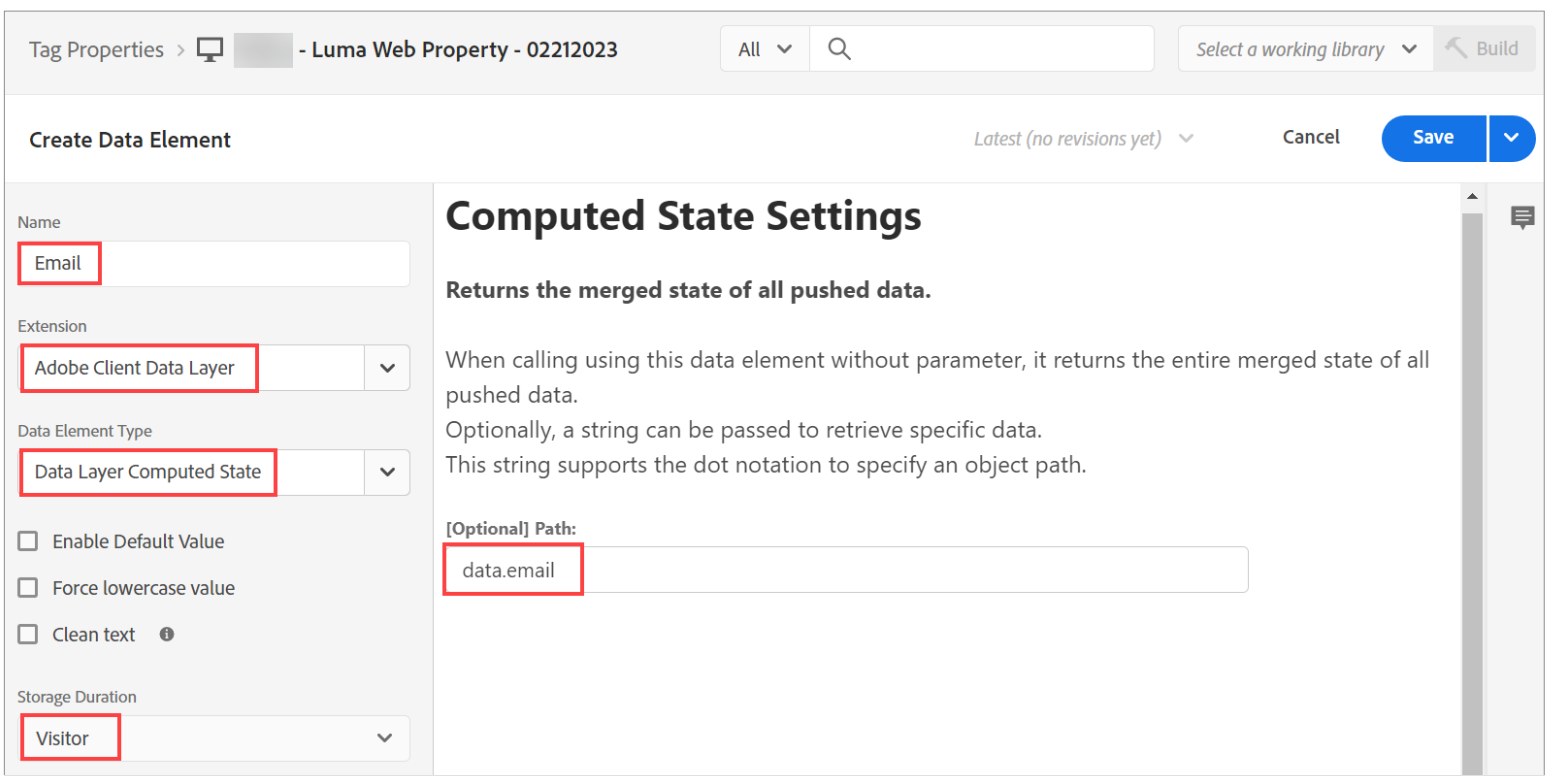
In the Name box, type Email.
-
From the Extension dropdown, select Adobe Client Data Layer.
-
From the Data Element Type dropdown, select Data Layer Computed State.
-
From the Storage Duration dropdown, select Visitor.
-
On the right, in the [Optional] Path box, type data.email.
The Email data element configuration should look similar to the below screenshot, as shown:
-
-
Click Save. The Email data element is created and listed on the Data Elements tab.
-
Similarly, perform steps 6 through 9 and create the following additional data elements using the information provided in the tables below:
- pageName
- pageType
- pageSection
- interactionType
- productName
- productCategory
- productInteraction
- productPrice
- totalCart
- productSku
- quantity
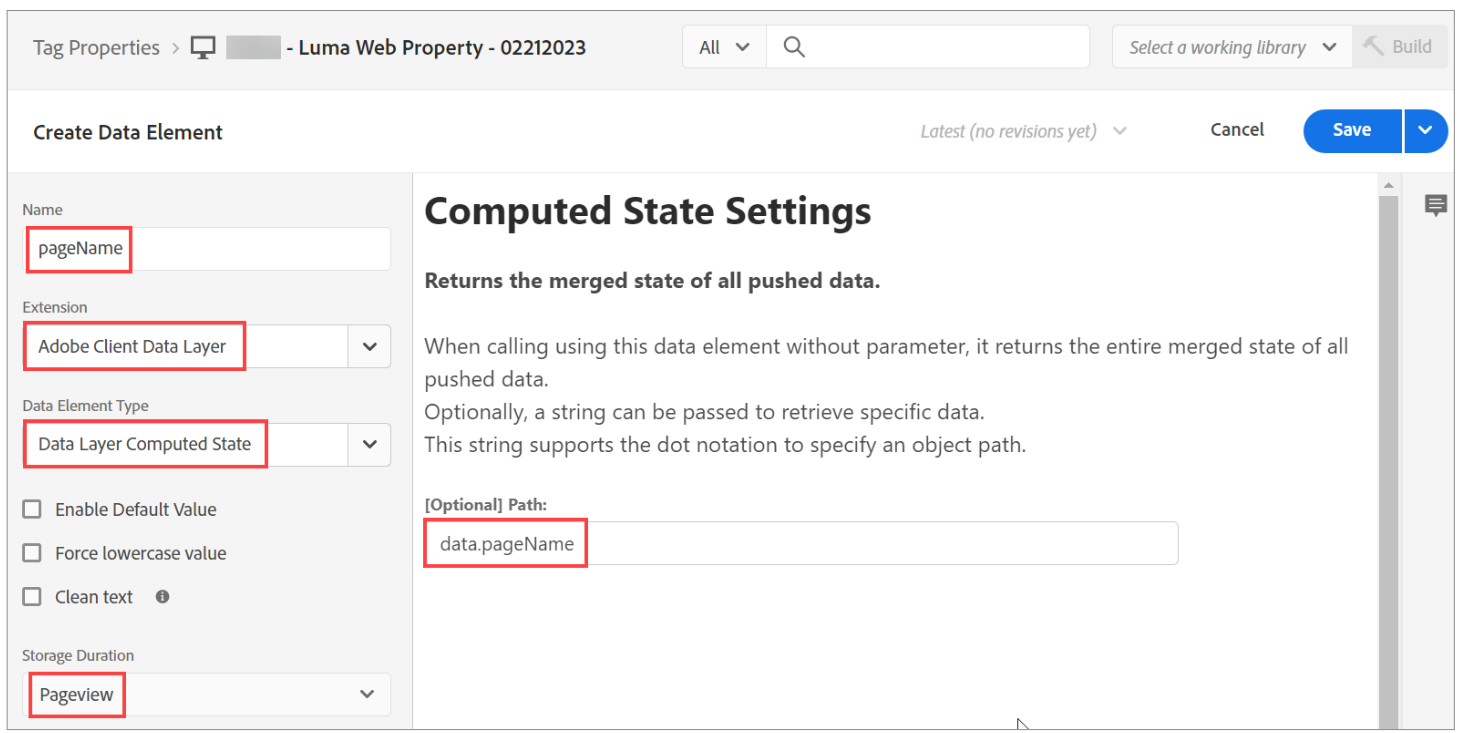
pageName
| Element | Values |
|---|---|
| Name | pageName |
| Extension | Adobe Client Data Layer |
| Data Element Type | Data Layer Computed State |
| Storage Duration | PageView |
| Path | data.pageName |
The pageName Data Element configuration should look similar to the below screenshot:
pageType
| Element | Values |
|---|---|
| Name | pageType |
| Extension | Adobe Client Data Layer |
| Data Element Type | Data Layer Computed State |
| Storage Duration | PageView |
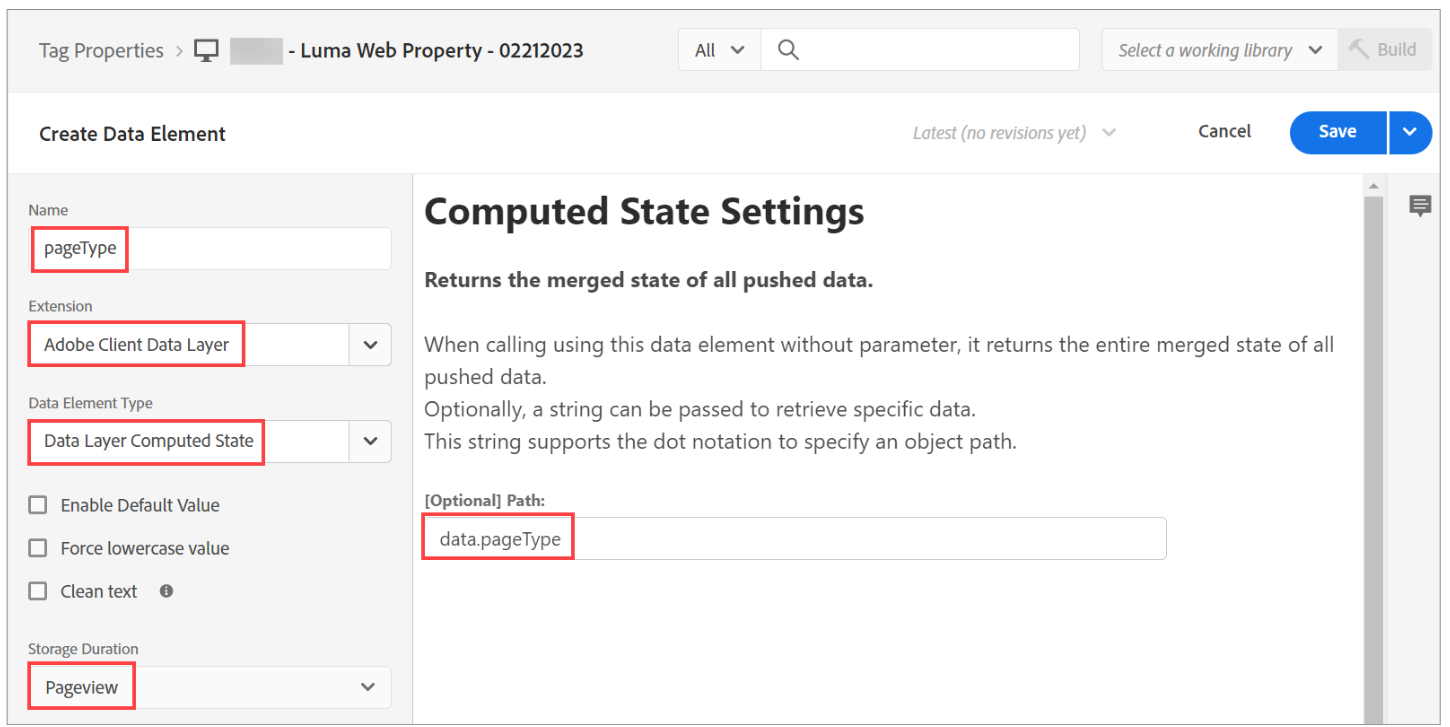
| Path | data.pageType |
The pageType Data Element configuration should look similar to the below screenshot:
pageSection
| Element | Values |
|---|---|
| Name | pageSection |
| Extension | Adobe Client Data Layer |
| Data Element Type | Data Layer Computed State |
| Storage Duration | PageView |
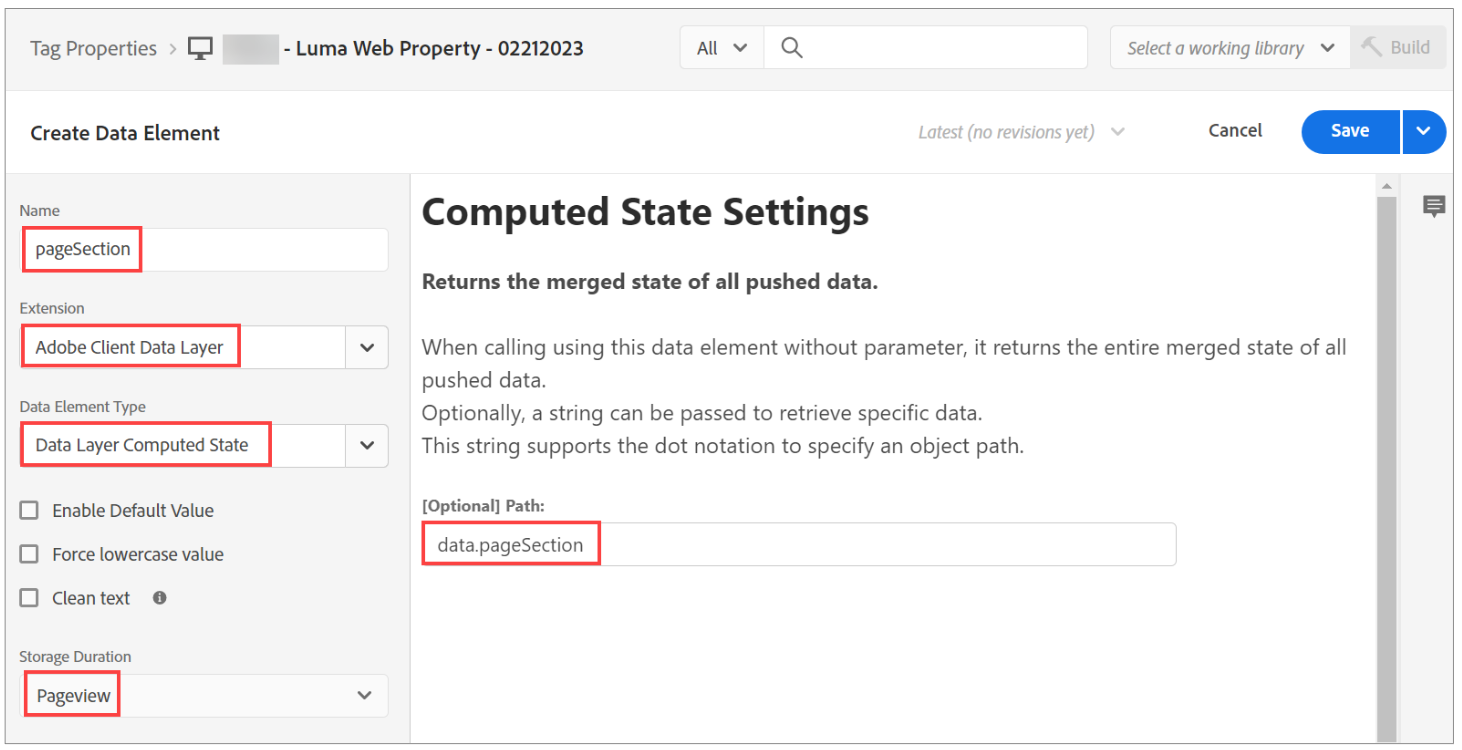
| Path | data.pageSection |
The pageSection Data Element configuration should look similar to the below screenshot:
interactionType
| Element | Values |
|---|---|
| Name | interactionType |
| Extension | Adobe Client Data Layer |
| Data Element Type | Data Layer Computed State |
| Storage Duration | PageView |
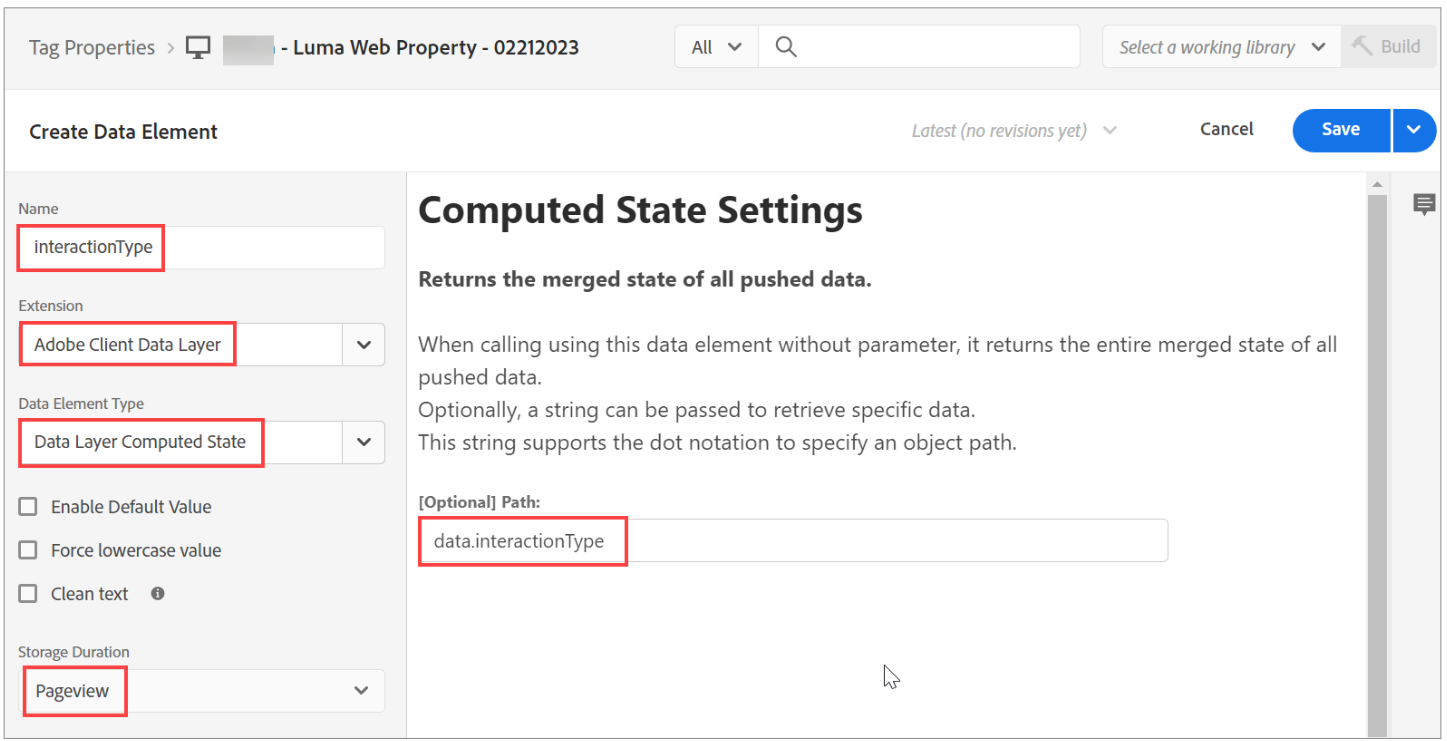
| Path | data.interactionType |
The interactionType Data Element configuration should look similar to the below screenshot:
productName
| Element | Values |
|---|---|
| Name | productName |
| Extension | Adobe Client Data Layer |
| Data Element Type | Data Layer Computed State |
| Storage Duration | PageView |
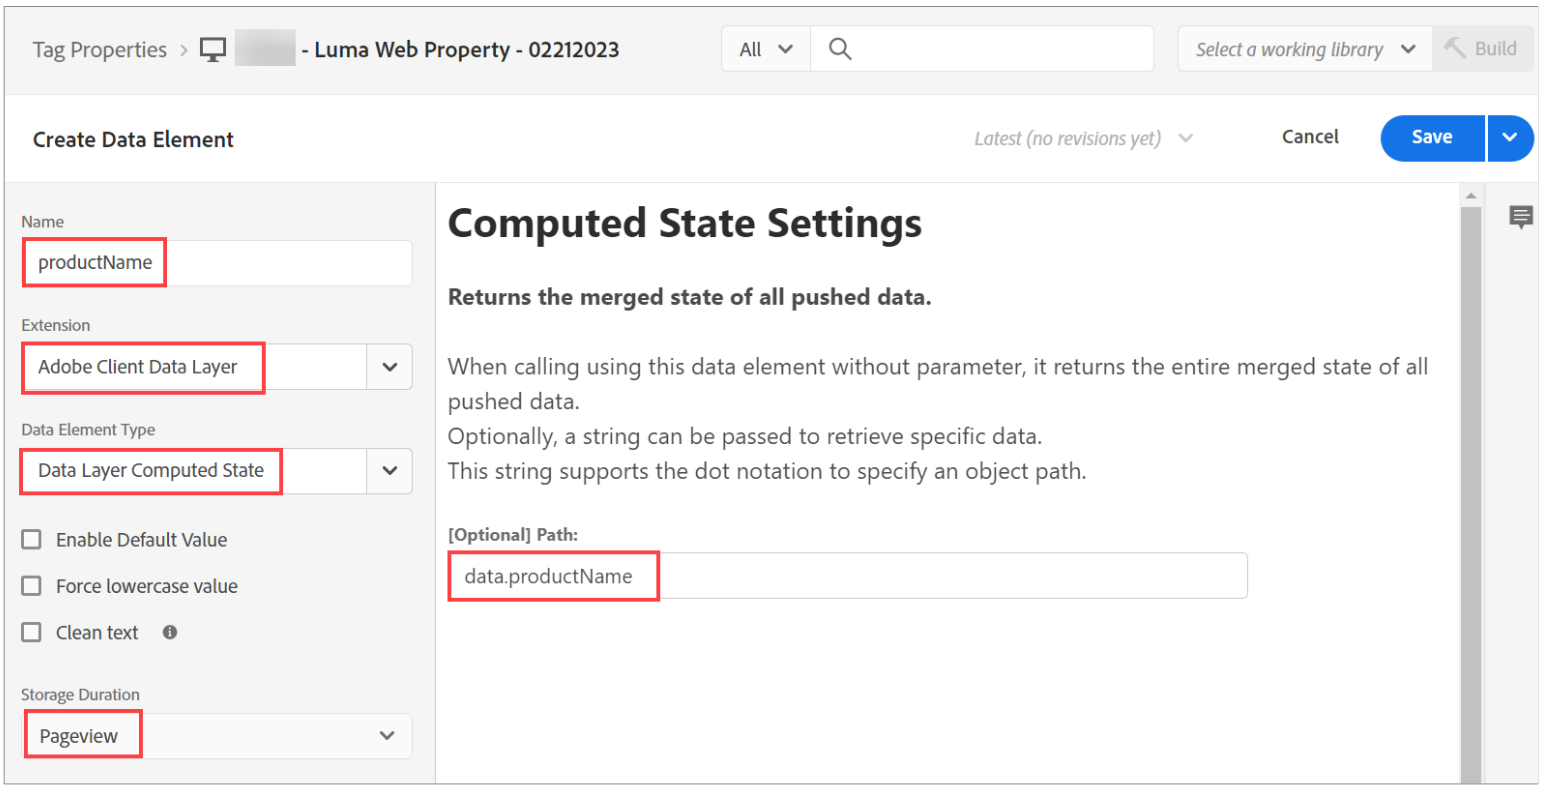
| Path | data.productName |
The productName Data Element configuration should look similar to the below screenshot:
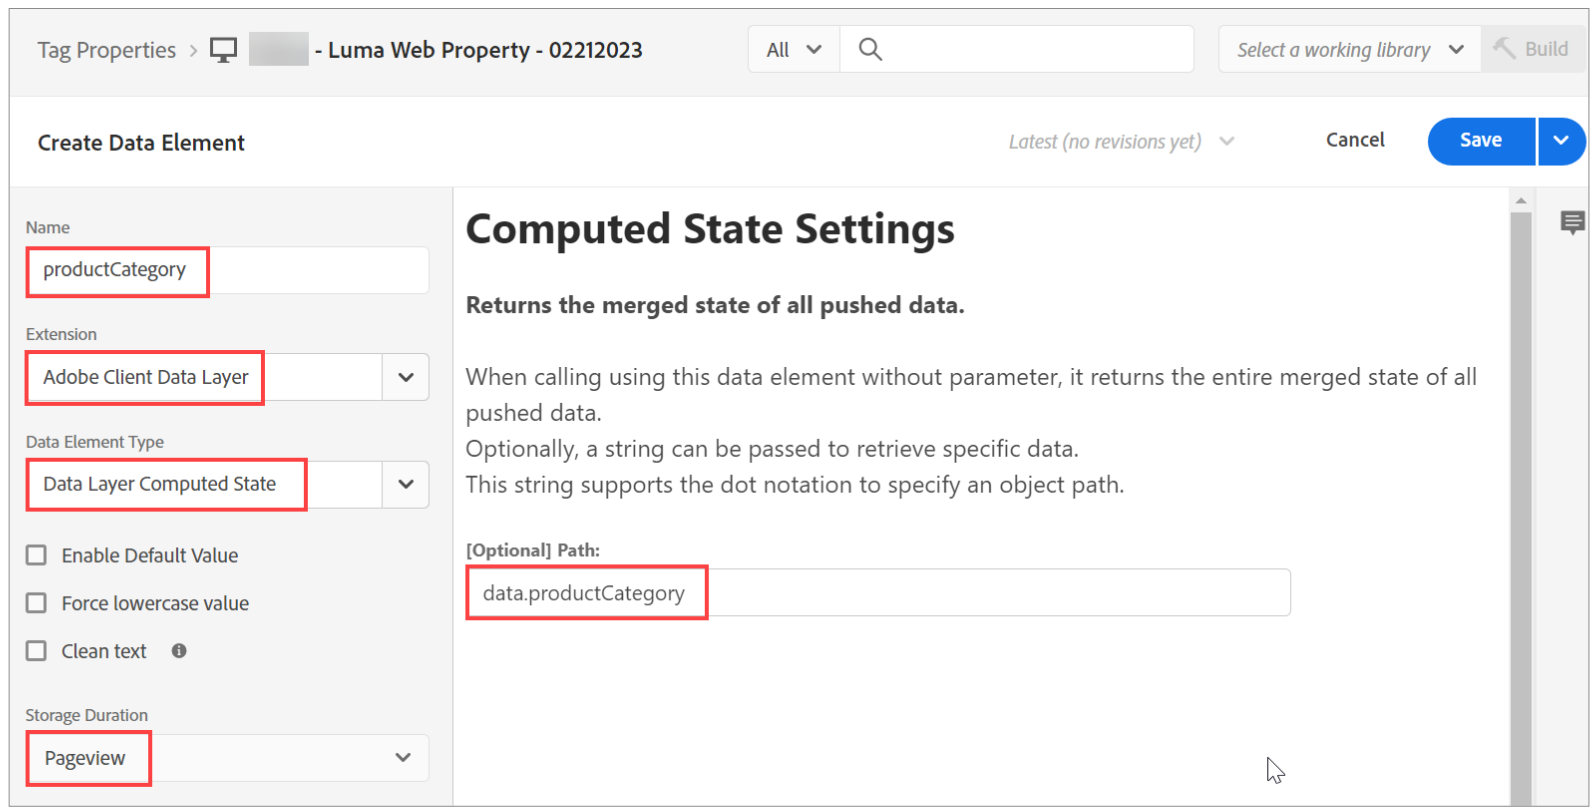
productCategory
| Element | Values |
|---|---|
| Name | productCategory |
| Extension | Adobe Client Data Layer |
| Data Element Type | Data Layer Computed State |
| Storage Duration | PageView |
| Path | data.productCategory |
The productCategory Data Element configuration should look similar to the below screenshot:
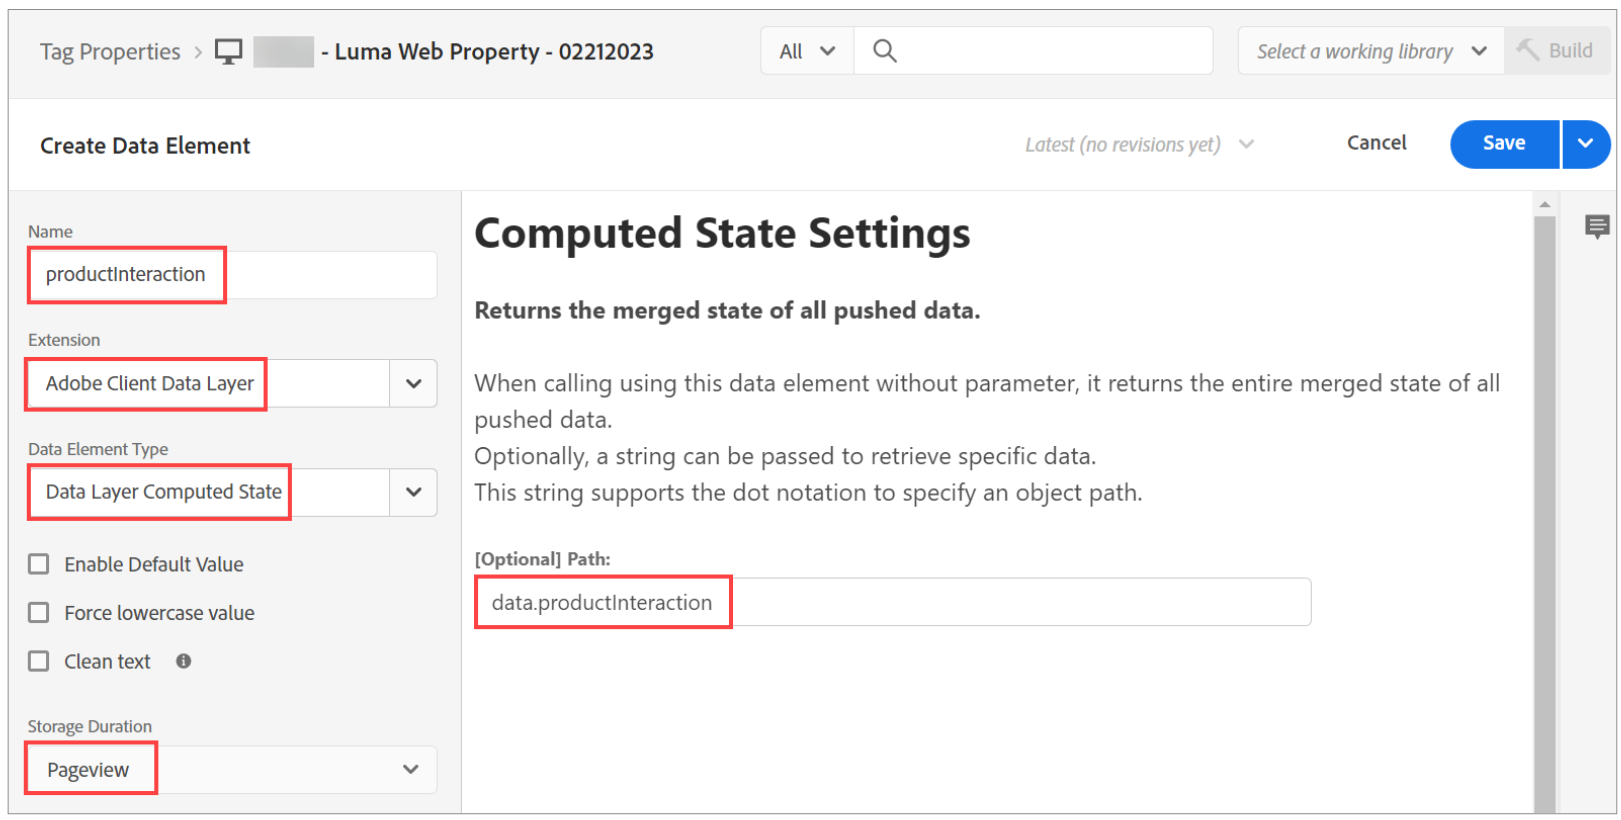
productInteraction
| Element | Values |
|---|---|
| Name | productInteraction |
| Extension | Adobe Client Data Layer |
| Data Element Type | Data Layer Computed State |
| Storage Duration | PageView |
| Path | data.productInteraction |
The productInteraction Data Element configuration should look similar to the below screenshot:
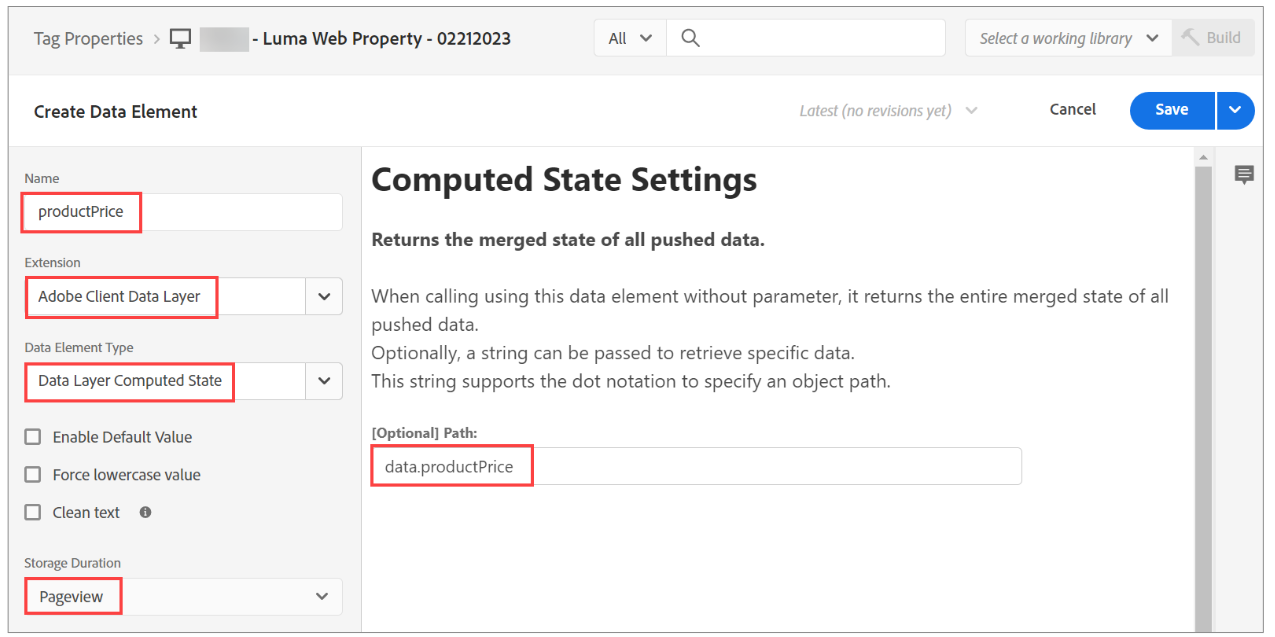
productPrice
| Element | Values |
|---|---|
| Name | productPrice |
| Extension | Adobe Client Data Layer |
| Data Element Type | Data Layer Computed State |
| Storage Duration | PageView |
| Path | data.productPrice |
The productPrice Data Element configuration should look similar to the below screenshot:
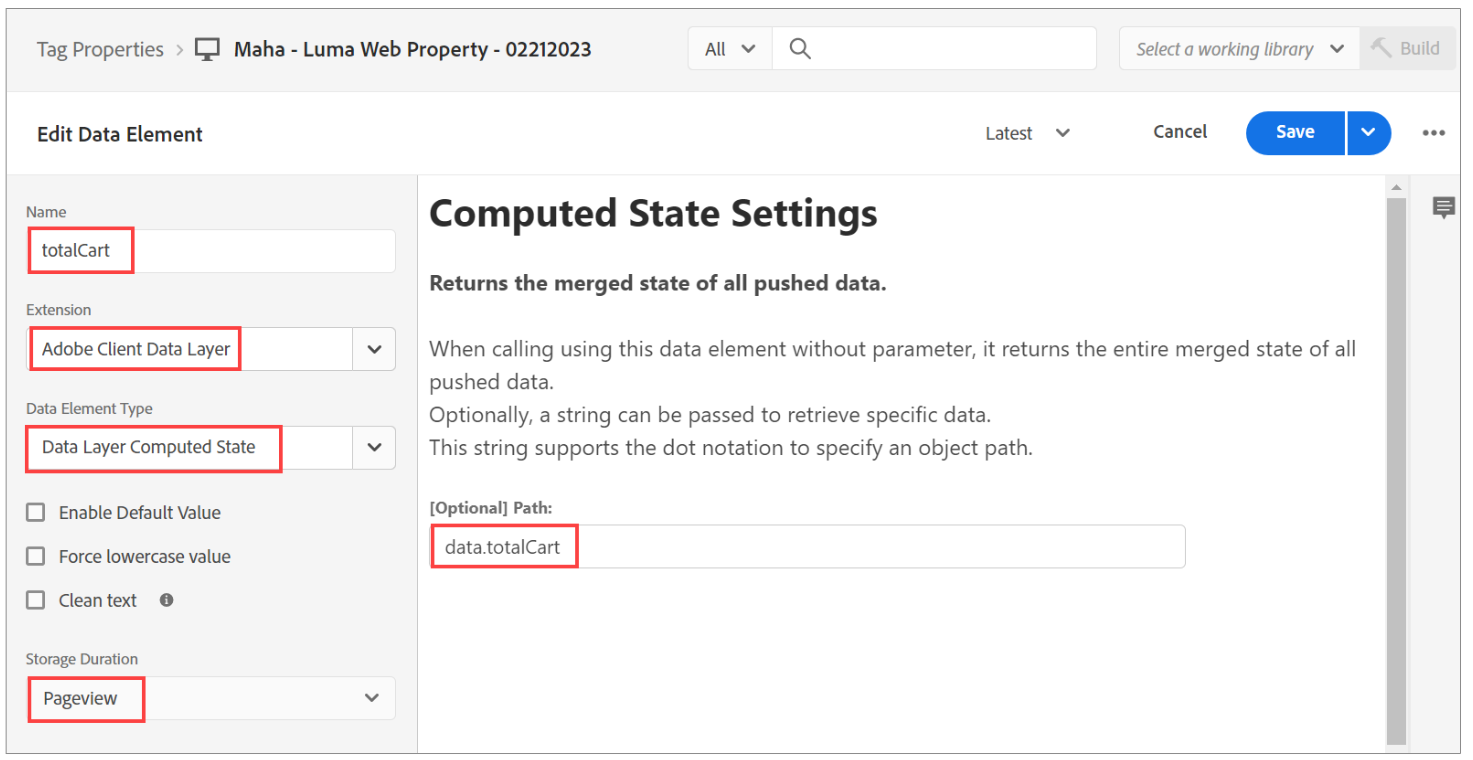
totalCart
| Element | Values |
|---|---|
| Name | totalCart |
| Extension | Adobe Client Data Layer |
| Data Element Type | Data Layer Computed State |
| Storage Duration | PageView |
| Path | data.totalCart |
The totalCart Data Element configuration should look similar to the below screenshot:
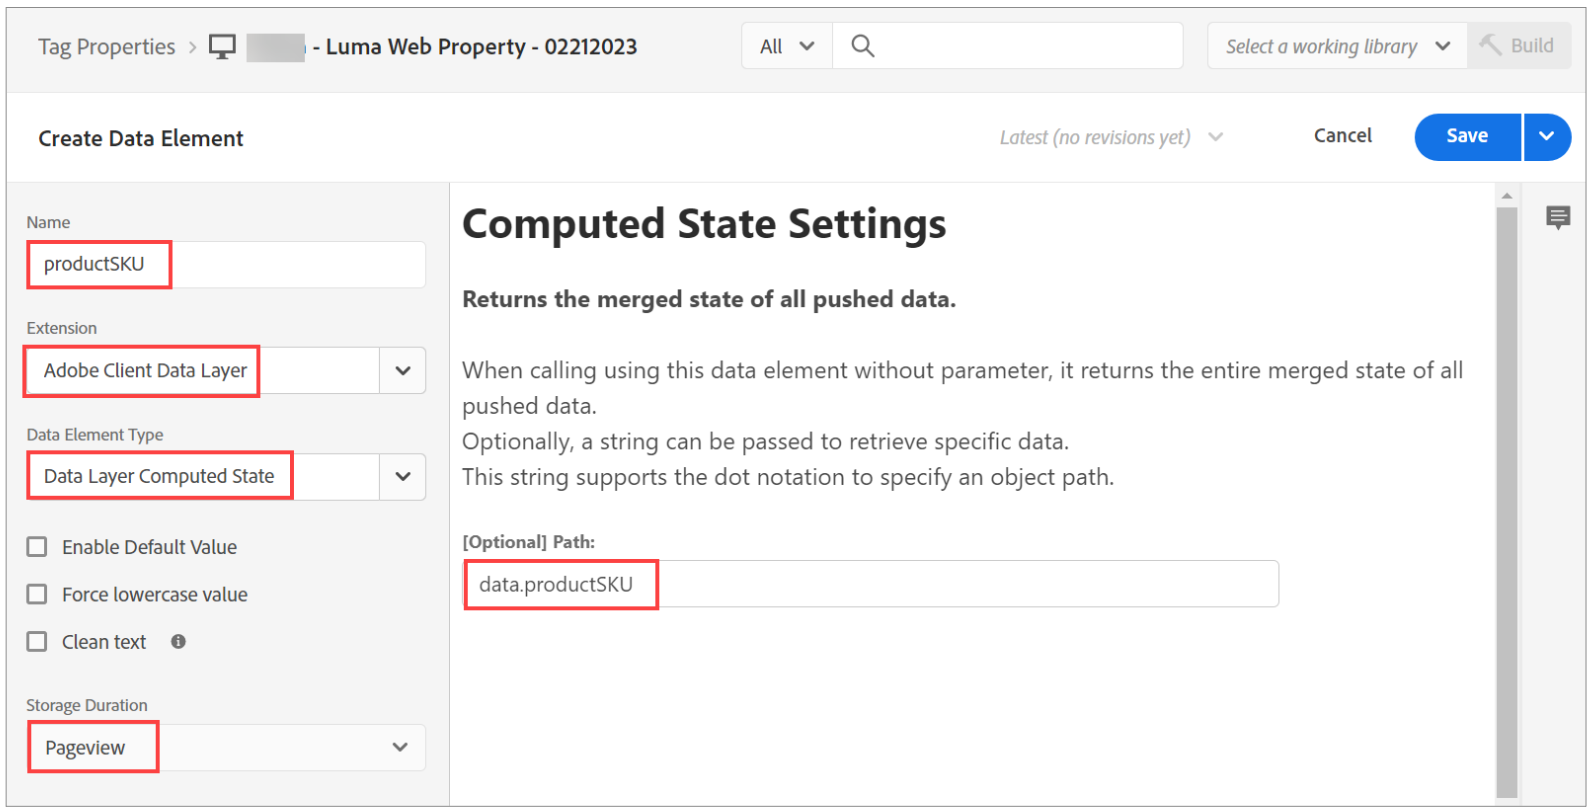
productSKU
| Element | Values |
|---|---|
| Name | productSKU |
| Extension | Adobe Client Data Layer |
| Data Element Type | Data Layer Computed State |
| Storage Duration | PageView |
| Path | data.productSKU |
The productSKU Data Element configuration should look similar to the below screenshot:
quantity
| Element | Values |
|---|---|
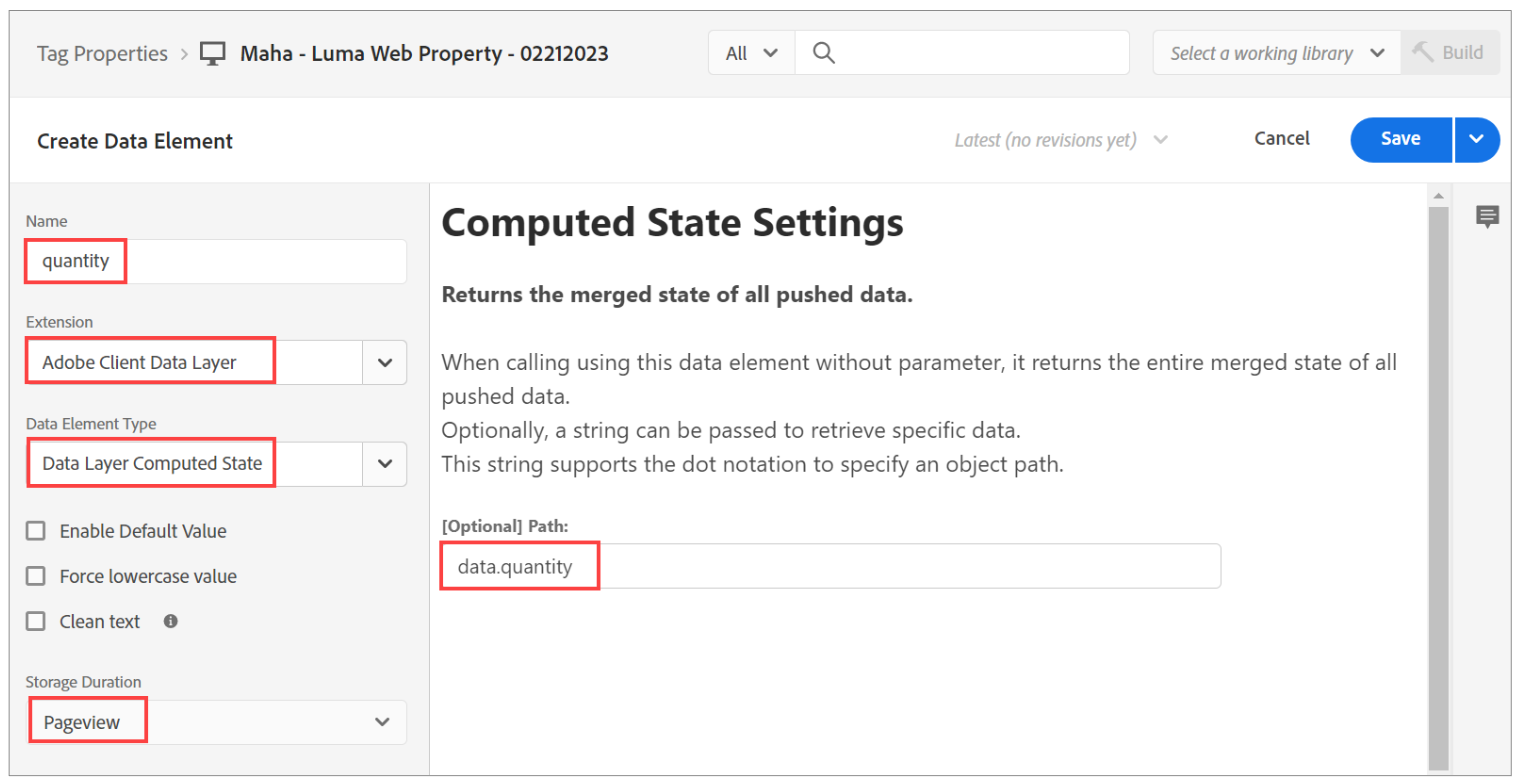
| Name | quantity |
| Extension | Adobe Client Data Layer |
| Data Element Type | Data Layer Computed State |
| Storage Duration | PageView |
| Path | data.productSKU |
The quantity Data Element configuration should look similar to the below screenshot:
Create Data Elements with Web SDK extension
- addToCat
- checkOut
- pageView
- productView
To create the addToCart Data Element:
- Ensure the Data Elements page is open.
- Click Add Data Element. The Create Data Element dialog opens.
- Perform the following actions:
- In the Name box, type addToCart.
- From the Extension dropdown, select Adobe Experience Platform Web SDK.
- From the Data Element Type dropdown, select XDM object.
- On the right, from the Sandbox dropdown, select your assigned sandbox. The PRODUCTION Prod (vA7) sandbox is used for demonstration purpose.
- From the Schema dropdown, select AEP Demo - Website Interactions Schema.
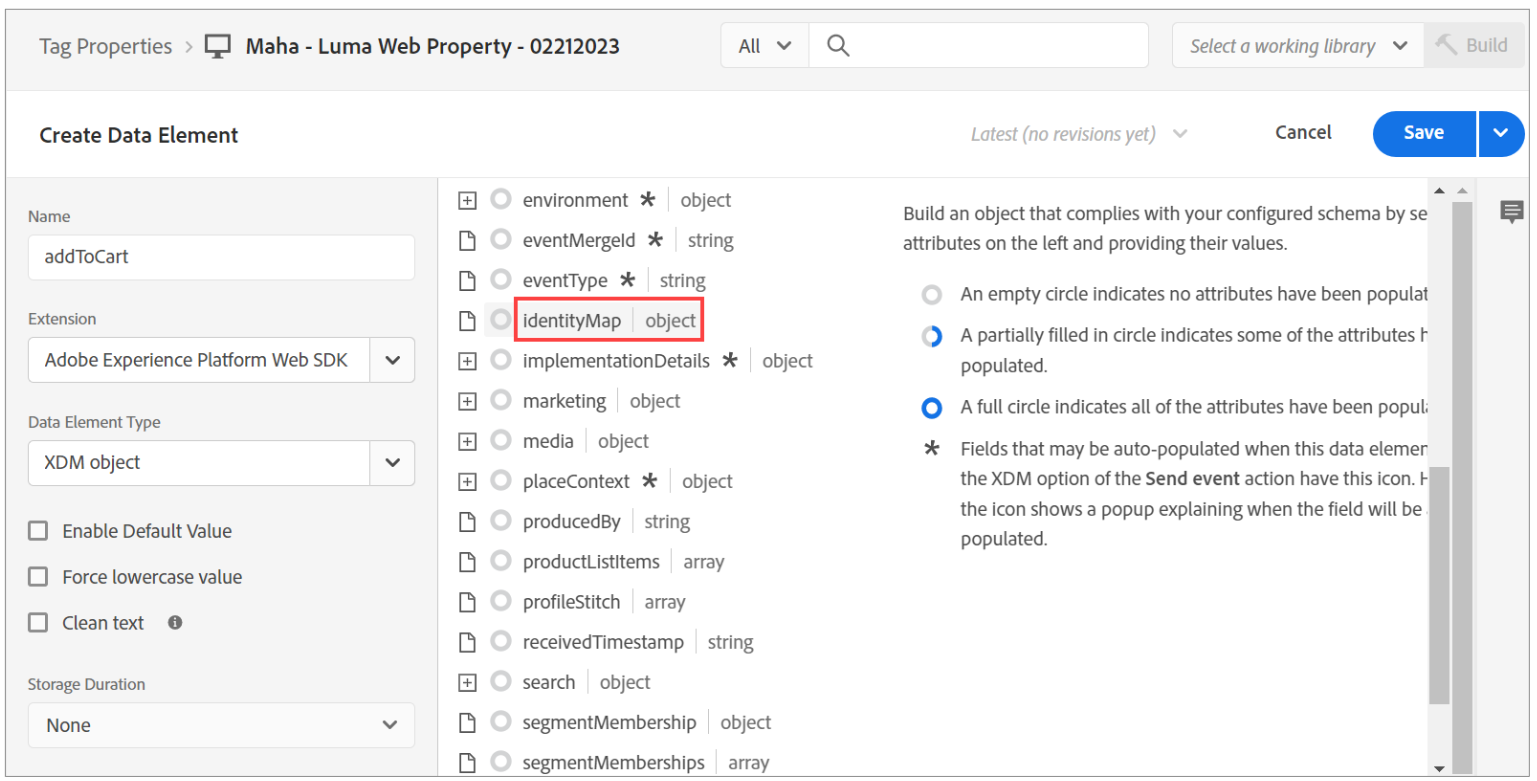
- Click identityMap from the XDM Object, as shown:
- Click the database icon, as shown:
 The Select Data Element dialog opens.
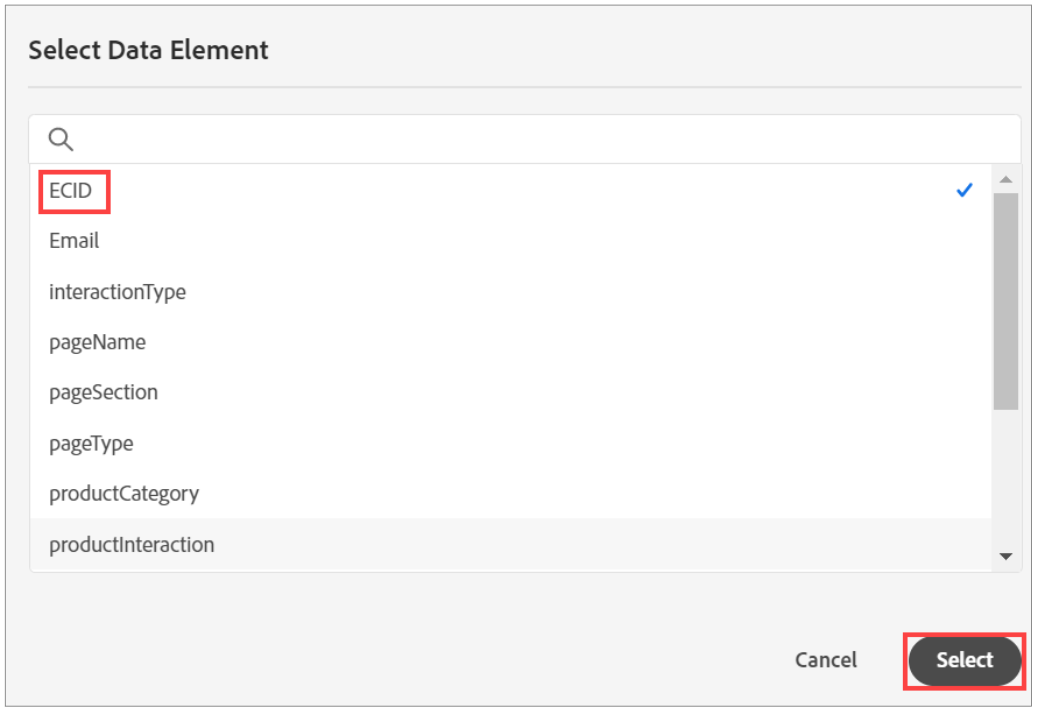
 - Select ECID Data Element that you created in the previous activity and click Select, as shown:
 The Value box appears on the right.
 - Click productListItems array in the XDM Object. The Product list items with Population strategy options appear on the right, as shown:
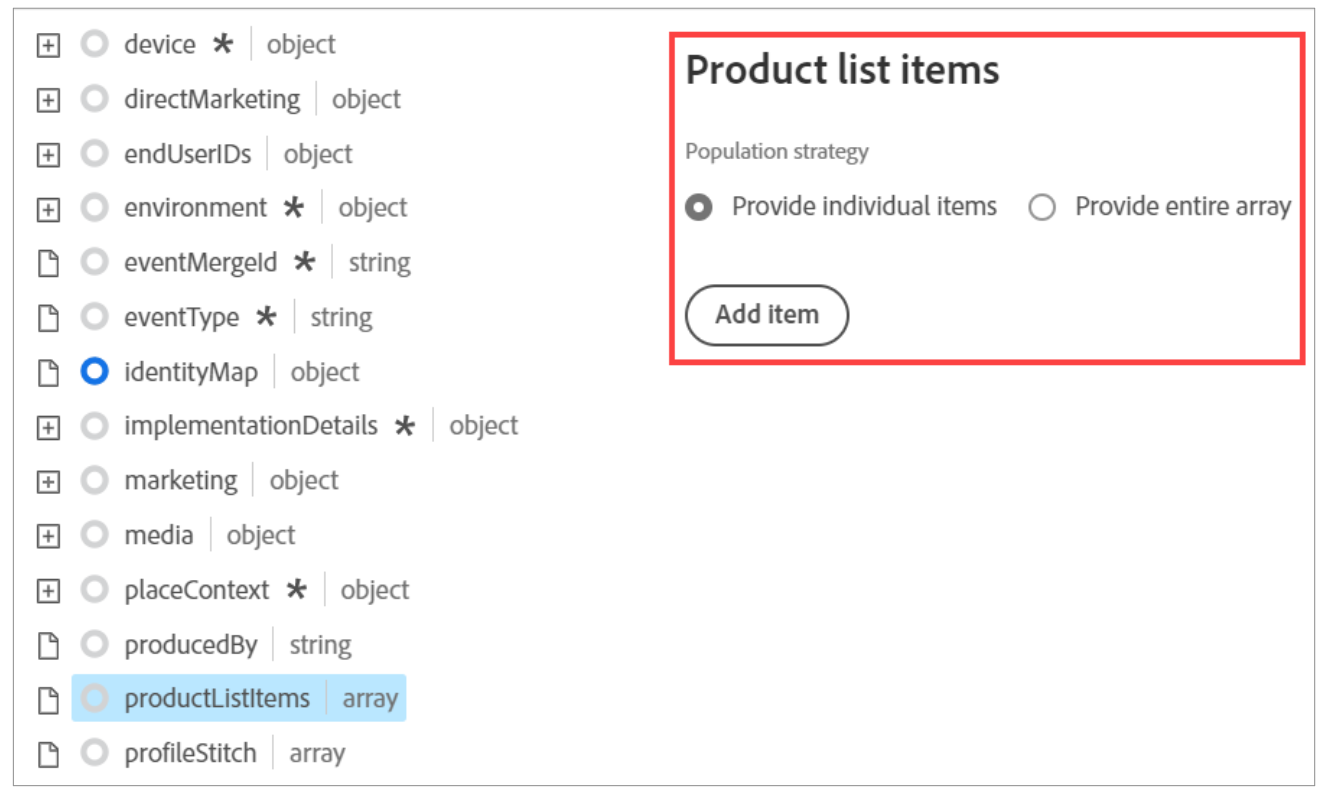
- Click Provide entire array. The Data element box appears.
- Type %cart.fix% in the Data element box.
- Expand web > webInteraction and click name. The Value box appears on the right.
- Click the database icon. The Select Data Element dialog opens.
- Select the pageName Data Element that you created in the previous activity and click Select.The Value box is now updated.
- Expand web > webPageDetails and click name. The Value box appears on the right.
- Click the database icon. The Select Data Element dialog opens.
- Select the pageName Data Element that you created in the previous activity and click Select.The Value box is now updated.
- Under webPageDetails, click siteSection. The Value box appears on the right.
- Click the database icon. The Select Data Element dialog opens.
- Select the pageSection Data Element that you created in the previous activity and click Select. The Value box is now updated.
- Click Save. The Data Element is created and listed on the Data Elements tab.
To create the checkOut Data Element:
- Ensure the Data Elements tab is open and click Add Data Element. The Create Data Element dialog opens.
- Perform the following actions:
- In the Name box, type checkOut.
- From the Extension dropdown, select Adobe Experience Platform Web SDK.
- From the Data Element Type dropdown, select XDM object.
- On the right, from the Sandbox dropdown, select your assigned sandbox.
- From the Schema dropdown, select AEP Demo - Website Interactions Schema.
- Click identityMap from the XDM Object.
- Click the database icon. The Select Data Element dialog opens.
- Select ECID Data Element that you created in the previous activity and click Select. The Value box appears on the right.
- Expand commerce > checkouts and click value. The Value box appears on the right.
- Type 1 in the Value box.
- Click order > currencyCode. The Value box appears on the right.
- In the Value box, type USD.
- Under order, click priceTotal. The Value box appears on the right
- Click the database icon. The Select Data Element dialog opens.
- Click the totalCart Data Element that you created in the previous activity and click Select. TheValue box is now updated.
- Click eventType. The Value box appears on the right.
- Click the database icon. The Select Data Element dialog opens.
- Click the interactionType D ata Element that you created in the previous activity and clickSelect. The Value box is now updated.
- Click productListItems. The Population strategy options appear on the right.
- Click Provide entire array. The Data Element box appears.
- In the Data Element box, type %cart.fix%.
- Expand web > webInteraction and click name. The Value box appears on the right.
- Click the database icon. The Select Data Element dialog opens.
- Click the pageName Data Element that you created in the previous activity and click Select. TheValue box is now updated.
- Expand web > webPageDetails and click name. The Value box appears on the right.
- Click the database icon. The Select Data Element dialog opens.
- Click the pageName Data Element that you created in the previous activity and click Select. TheValue box is now updated.
- Expand web > webPageDetails and click name. The Value box appears on the right.
- Click the database icon. The Select Data Element dialog opens.
- Click the pageName Data Element that you created in the previous activity and click Select. TheValue box is now updated.
- Under webPageDetails, click siteSection. The Value box appears on the right.
- Click the database icon. The Select Data Element dialog opens.
- Click the pageSection Data Element that you created in the previous activity and click Select. The Value box is now updated.
- Click Save. The Data Element is created and listed on the Data Elements tab.
To create the pageView Data Element: 8. Ensure the Data Elements tab is open and click Add Data Element. The Create Data Element dialog opens. 9. Perform the following actions:
- In the Name box, type pageView.
- From the Extension dropdown, select Adobe Experience Platform Web SDK.
- From the Data Element Type dropdown, select XDM object.
- On the right, from the Sandbox dropdown, select your assigned sandbox.
- From the Schema dropdown, select AEP Demo - Website Interactions Schema.
- Click identityMap from the XDM Object.
- Click the database icon. The Select Data Element dialog opens.
- Select ECID Data Element that you created in the previous activity and click Select. The Value box appears on the right.
- Click productListItems. The Population strategy options appear on the right.
- Click Provide entire array. The Data Element box appears.
- I n the Data Element box, t ype %cart.fix%.
- Expand web > webInteraction and click name. The Value box appears on the right.
- Click the database icon. The Select Data Element dialog opens.
- Click the pageName Data Element that you created in the previous activity and click Select. TheValue box is now updated.
- Expand web > webPageDetails and click name. The Value box appears on the right.
- Click the database icon. The Select Data Element dialog opens.
- Click the pageName D ata Element that you created in the previous activity and click Select. The Value box is now updated
- Under webPageDetails, click siteSection. The Value box appears on the right.
- Click the database icon. The Select Data Element dialog opens.
- Click the pageSection Data Element that you created in the previous activity and click Select.The Value box is now updated.
- Click Save. The Data Element is created and listed on the Data Elements tab.
To create the productView Data Element:
- Ensure the Data Elements tab is open and click Add Data Element. The Create Data Element dialog opens.
- Perform the following actions:
- In the Name box, type productView.
- Select Adobe Experience Platform Web SDK from the Extension dropdown.
- Select XDM object from the Data Element Type dropdown.
- On the right, from the Sandbox dropdown, select your assigned sandbox. In this step,PRODUCTION Prod (vA7) is used for demonstration purpose.
- From the Schema dropdown, select AEP Demo - Website Interactions Schema.
- Click identityMap from the XDM Object.
- Click the database icon. The Select Data Element dialog opens.
- Select ECID Data Element that you created in the previous activity and click Select. The Value box appears on the right.
- Click productListItems. The Population strategy options appear on the right.
- Click Provide entire array. The Data Element box appears.
- In the Data Element box, t ype %cart.fix%.
- Expand commerce > productViews and click id. The Value box appears on the right.
- Click the database icon. The Select Data Element dialog opens.
- Select the productSku D ata Element that you created in the previous activity and click Select. he Value box is now updated.
- Under commerce > productViews, click value. The Value box appears on the right.
- In the Value box, t ype 1.
- Click eventType. The Value box appears on the right.
- In the Value box, type commerce.productViews.
- Expand web > webInteraction and click name. The Value box appears on the right.
- Click the database icon. The Select Data Element dialog opens.
- Click the pageName Data Element that you created in the previous activity and click Select. TheValue box is now updated.
- Expand web > webPageDetails and click name. The Value box appears on the right.
- Click the database icon. The Select Data Element dialog opens.
- Click the pageName Data Element that you created in the previous activity and click Select. TheValue box is now updated.
- Under webPageDetails, click siteSection. The Value box appears on the right.
- Click the database icon. The Select Data Element dialog opens.
- Click the pageSection Data Element that you created in the previous activity and click Select.The Value box is now updated.
- Click Save. The Data Element is created and listed on the Data Elements tab.
