Let's create a new XDM schema to capture the customer interactions on a website.This is an event or time series type schema. Unlike a attributes or record- type schema, this event schema manages the events as they occur. So, events schemas are Time Series- type schema.
- Create an event XDM schema.
- Add field groups to the XDM schema.
- Define identity mapping.
Create an Event XDM Schema
-
On the browser, navigate to Experience Platform Home page.
-
On the left menu, under DATA MANAGEMENT, click Schemas. The Schemas page opens.
-
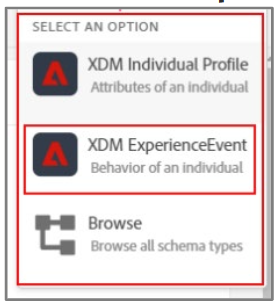
On the top- right, click Create schema to create a new schema. A drop - down list of schema types is displayed.
-
Click XDM ExperienceEvent, as shown, to create an event XDM schema.
 The Untitled schema page opens.
 -
On the right pane Schema properties section, in the Display name box, type Web Site Interactions Schema as shown:

-
Click Save to save the schema. The Schema saved successfully message appears. The newly created schema displays a default class containing some fields and field structures. Observe that under the Class section, XDM ExperienceEvent class is listed
UI updates:

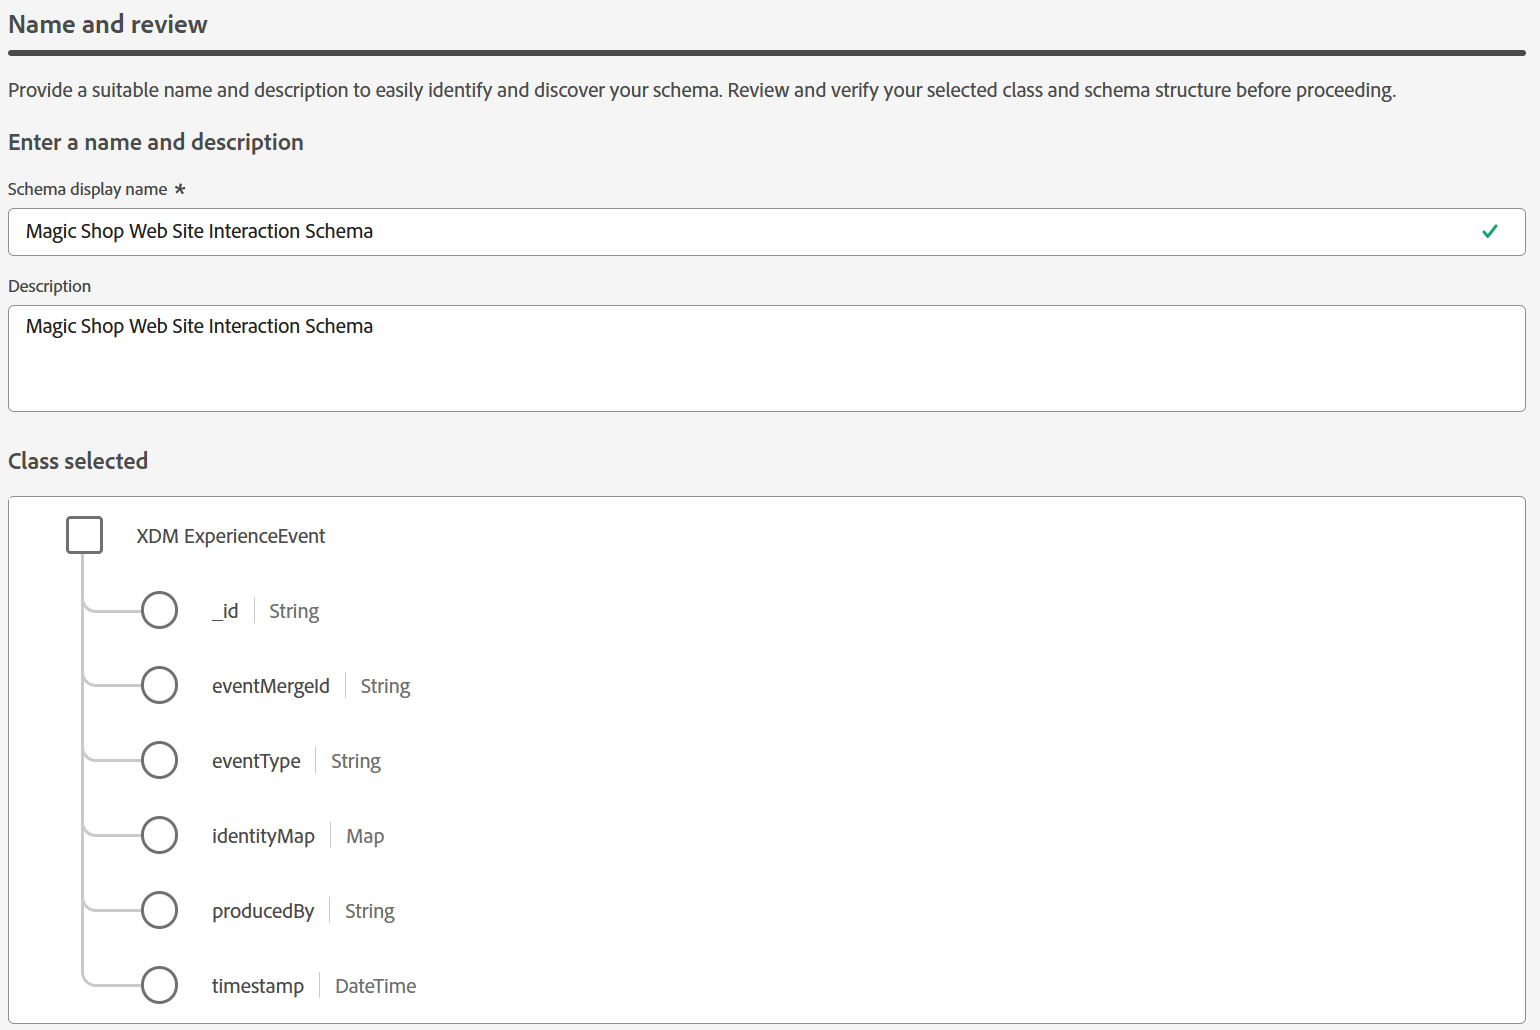
Add Field Groups to the XDM Schema
-
On the left pane, under the Composition > Field groups section, click Add, as shown, to add the field groups.
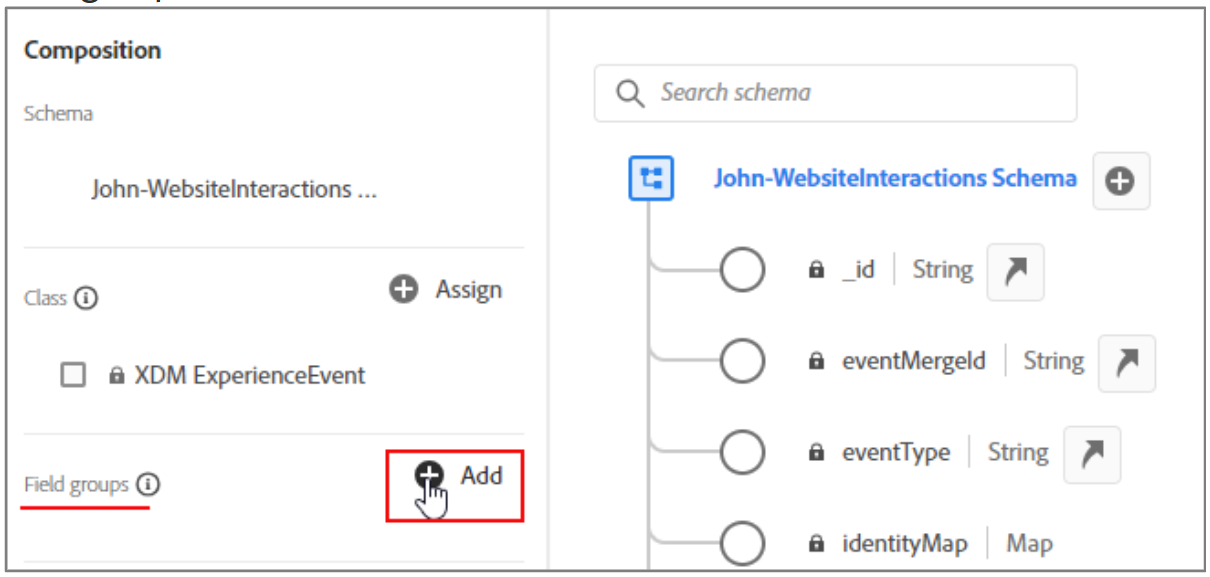 The Add field groups page opens.
 -
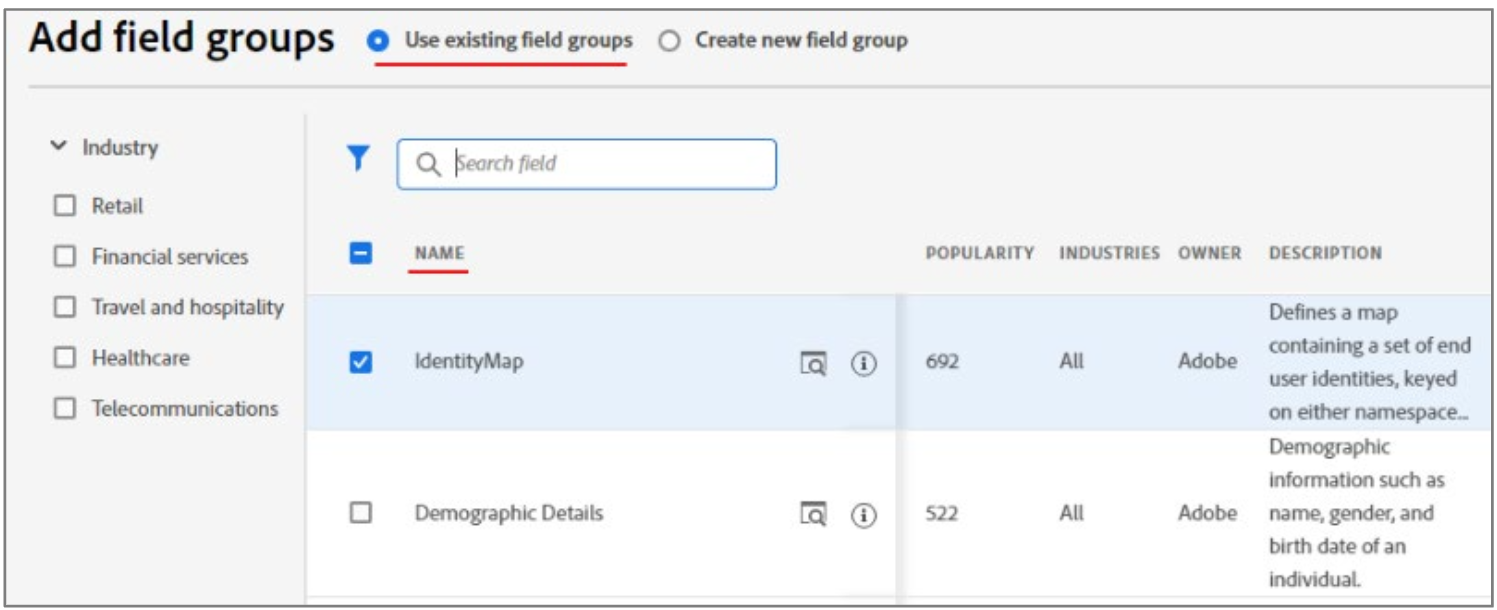
Retain the selection of Use existing field groups.
-
From the NAME column, select the following field groups, by clicking the checkboxes, as shown:
-
IdentityMap
-
Search Details
-
Orchestration eventID
-
AEP Web SDK ExperienceEvent
-
Campaign Marketing Details
-
Experience Event - Proposition Reference
-
Experience Event - Proposition Interactions
-
Commerce details
-
-
On the top- right, click Add field groups to add the selected field groups to the schema. The added field groups appear on the schema Composition pane, as shown
-
Click Save to save the edits to the schema.
Add Custom Field groups
-
On the left pane, under the Composition > Field groups section, click Add to add a new field group. The Add field groups page opens.
-
Click the option Create a new field group. The Create a new field group section opens.
-
In the Display name section, type ExperienceEvent Core v2.1.
-
In the Description section, type ExperienceEvent Core v2.1, as shown:
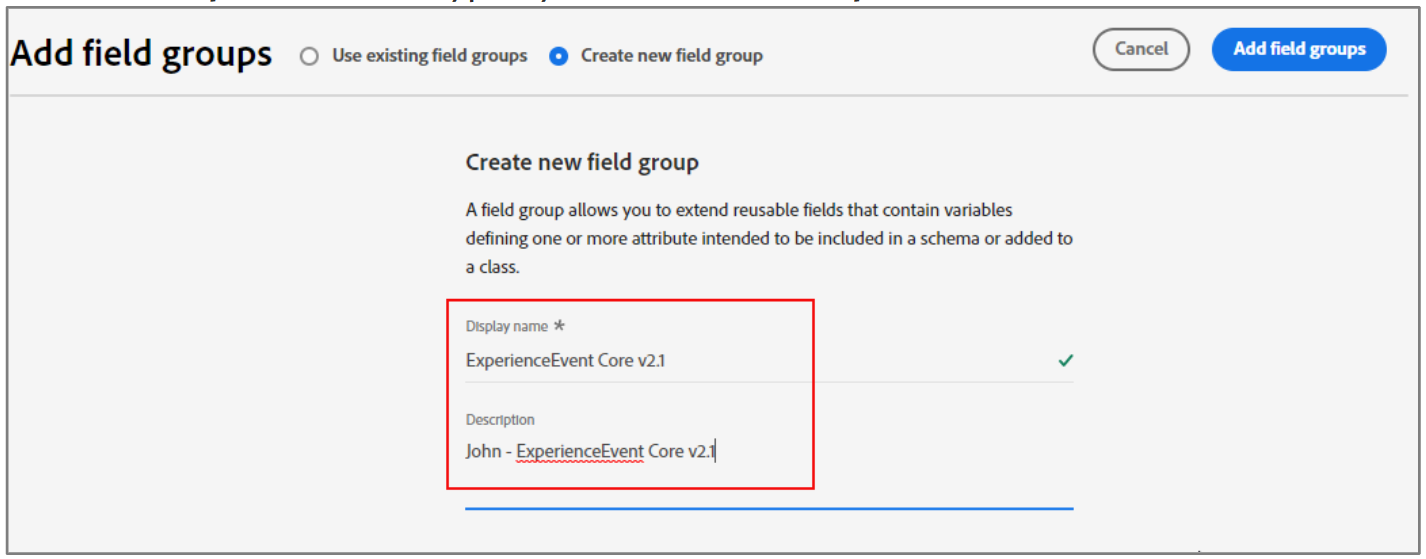
-
Click Add field groups to add the newly created field group to the schema. The schema structure is updated with the newly added field group. However, the new field group is still empty. You will add fields to the new field group.
-
On the left pane, under the Field groups section, click the newly added field groupExperienceEvent Core v2.1.
-
Next to your schema name, click the add field icon, as shown:
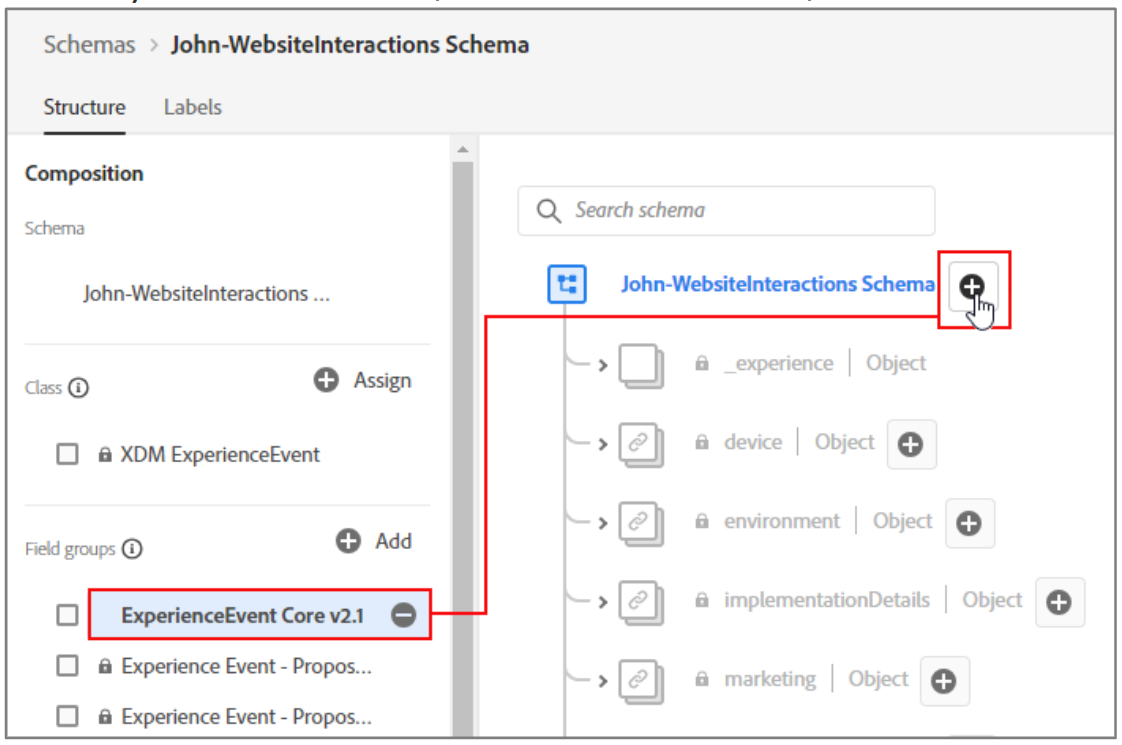 A new field named Untitled Field | Type is added to the schema.
 -
To define the new field, click Untitled Field I Type. The Field properties pane opens on the right.
-
Provide the following details, as shown:
-
In the Field name box, type identification.
-
In the Display name box, type identification.
-
From the Type drop- down menu, select Object.
-
Click the Field Group drop- down arrow to select the previously created ProfileIdentification field group.
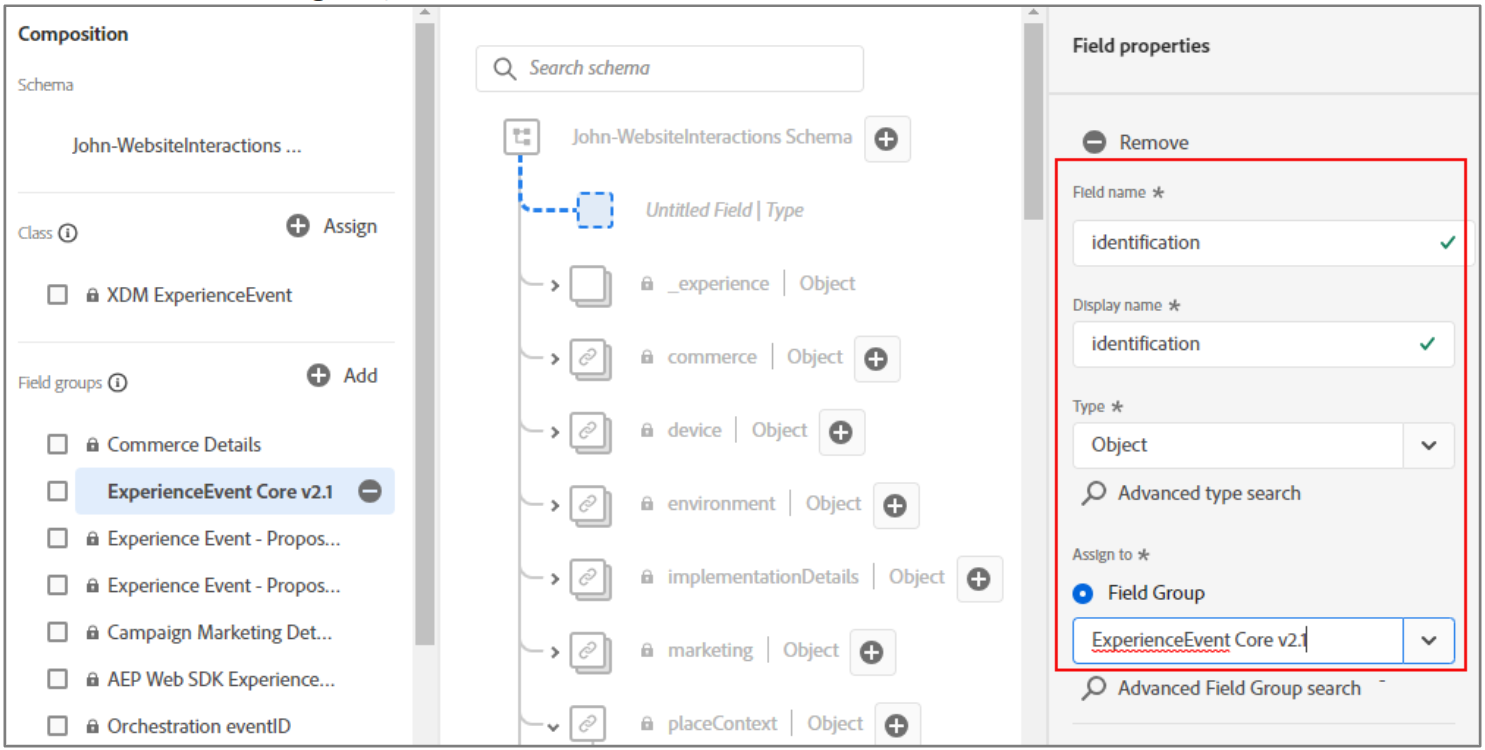
-
Click Apply to complete creating the object field. The newly created identification object is added to the structure, as shown:
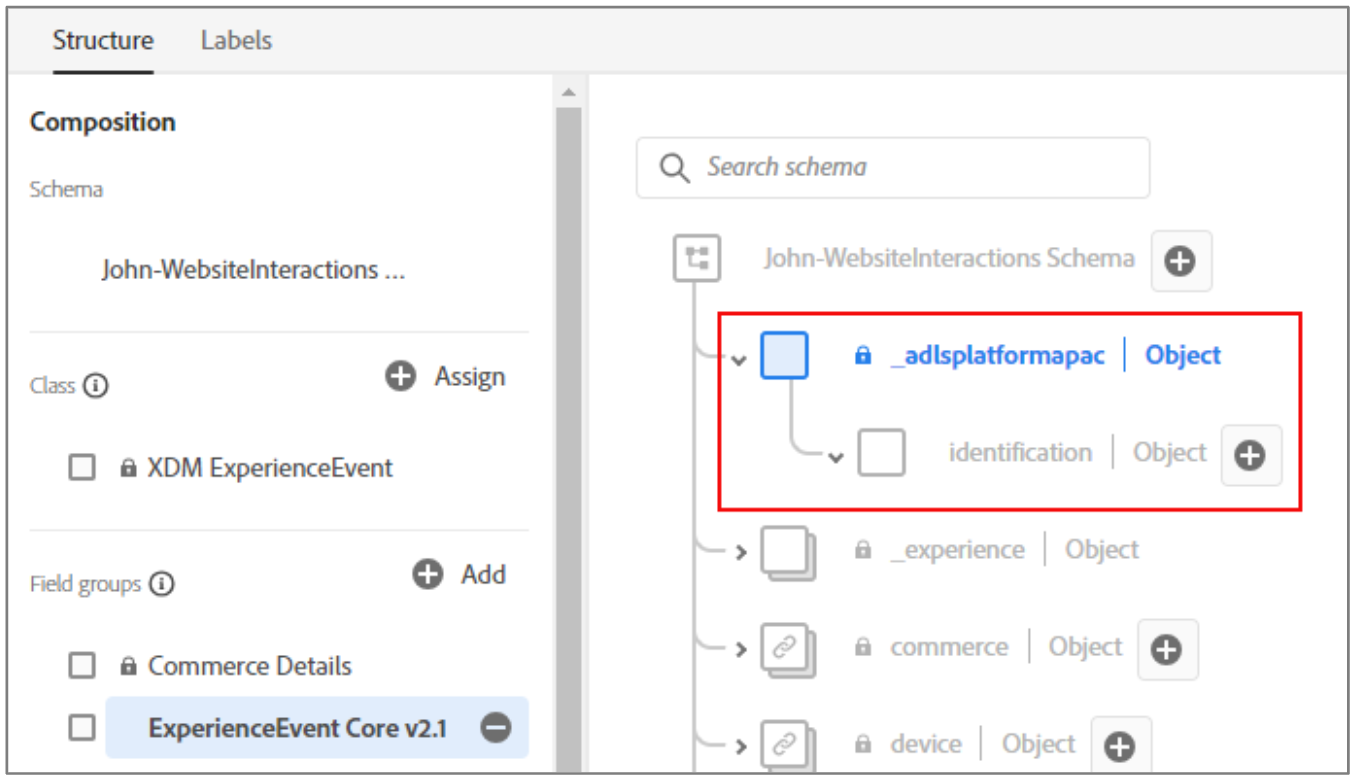 The new field represents a custom object under your Experience Platform Tenant ID. In this example, the tenant ID is _adlsplatformapac.
Note: You can check the Tenant ID for your Experience Platform instance in yourEnvironment Variables. In these activities, the name of the Tenant ID is based on theExperience Platform instance you are using, such as EMEA, US, JAPAN, and APAC.
You will now add ecid, emailId, and phoneNumber fields to this identification object.
-
-
Click the add field icon next to identification | Object, as shown:

-
A new field named Untitled Field | Type is added under identification. The Field properties pane appear on the right.
-
To configure the values for the ecid field on the Field properties pane, perform the following steps:
- In the Field name box, type ecid.
- In the Display name box, type ecid.
- emailIdSha256 (primary)
- From the Type drop- down menu, select String, as shown:
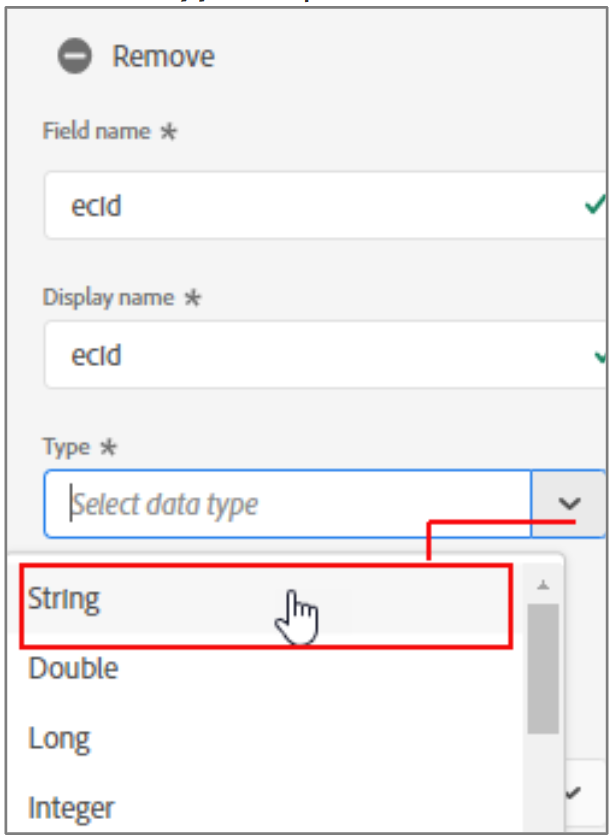
- Scroll down and click Apply to save the field. After the initial field configuration is complete,the ecid field appears under the identification | Object node.
-
Click the add field icon next to identification | Object to add another new field for emailId. A new field named Untitled Field | Type is added under identification | Object. Empty field detail boxes appear on the right pane.
-
To configure the values for the emailId field, perform the following steps:
- In the Field name box, type emailId.
- In the Display name box, type emailId.
- From the Type drop- down menu, select String.
- Scroll down and click Apply to save. The phoneNumber field appears under the identification | Object:

-
Click the add field icon next to the identification | Object to add another new field for phoneNumber. A new field named Untitled Field | Type is added under identification | Object.Empty field detail boxes appear on the right pane.
-
To configure the values for the p honeNumber field, perform the following steps:
- In the Field name box, type phoneNumber.
- In the Display name box, type phoneNumber.
- From the Type drop- down menu, select String.
- Scroll down and click Apply to save the field. After the initial field configuration is complete,the emailId field appears under identification | Object node, as shown:
-
Observe that in the field group structure, each field is defined as String type, as shown:
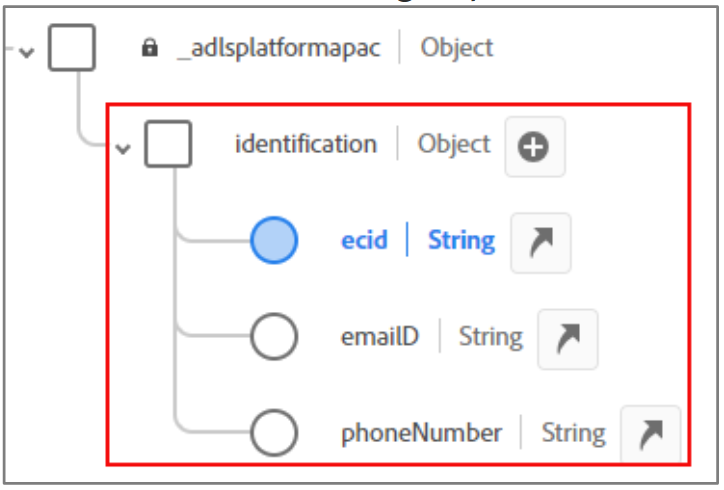
-
Click Save to save the changes to the schema.
