Perform the following tasks
- Create an audience for customers who purchased products in the past
- Create an audience of male customers who added a product to the website cart
- Create an audience of male customers who added a product using mobile phones
- Create a new audience of male purchasers, whose product add method was website or mobile phones
- Activate the audience to a destination
Create an Audience for Customers Who Purchased Products in the Past
- Click Create audience. The Create audience dialog opens.
- Ensure the Build rule audience creation method is selected and click Create. The rule builder opens.
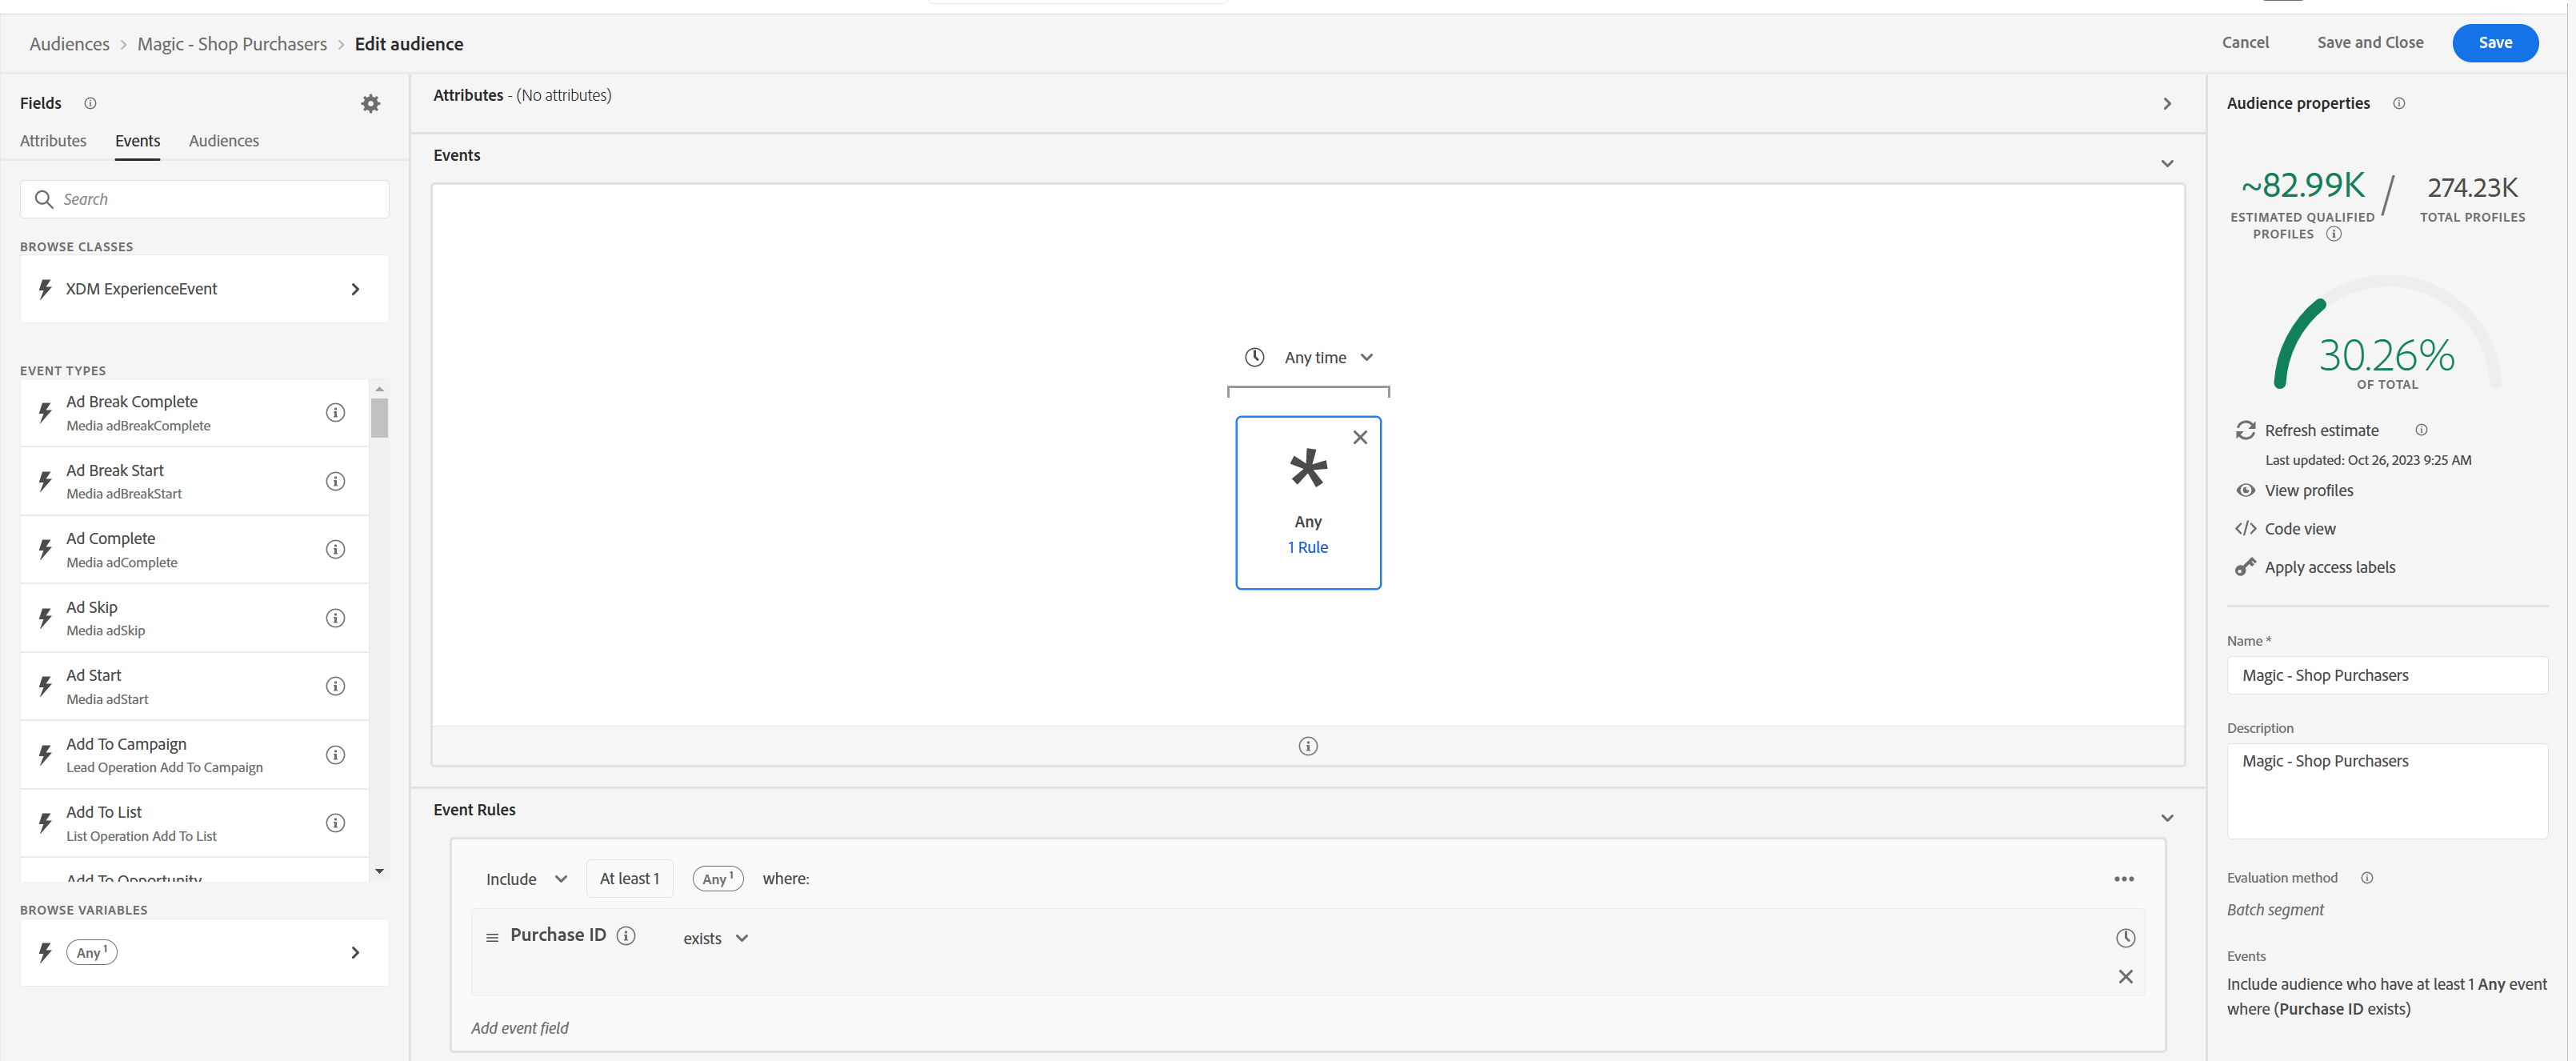
- On the left pane, on the Events tab, type Purchase ID in the search box. The Purchase ID events type is displayed.
- Drag and drop Purchase ID onto the rule builder.
- Under Event Rules, click the equals drop - down arrow and select exists.
- In the Name box on the right pane, type a suitable name such as Your initials Purchasers.
- Click Save to save the audience.
Create an Audience of Male Customers Who Added a Product to the Web site Cart
-
Click Create audience. The Create audience dialog opens.
-
Ensure the Build rule audience creation method is selected and click Create. The rule builder is displayed.
-
On the left pane, ensure you are on the Attribute tab and navigate to XDM Individual Profile > Adlsplatform Individual recognition > Core.
-
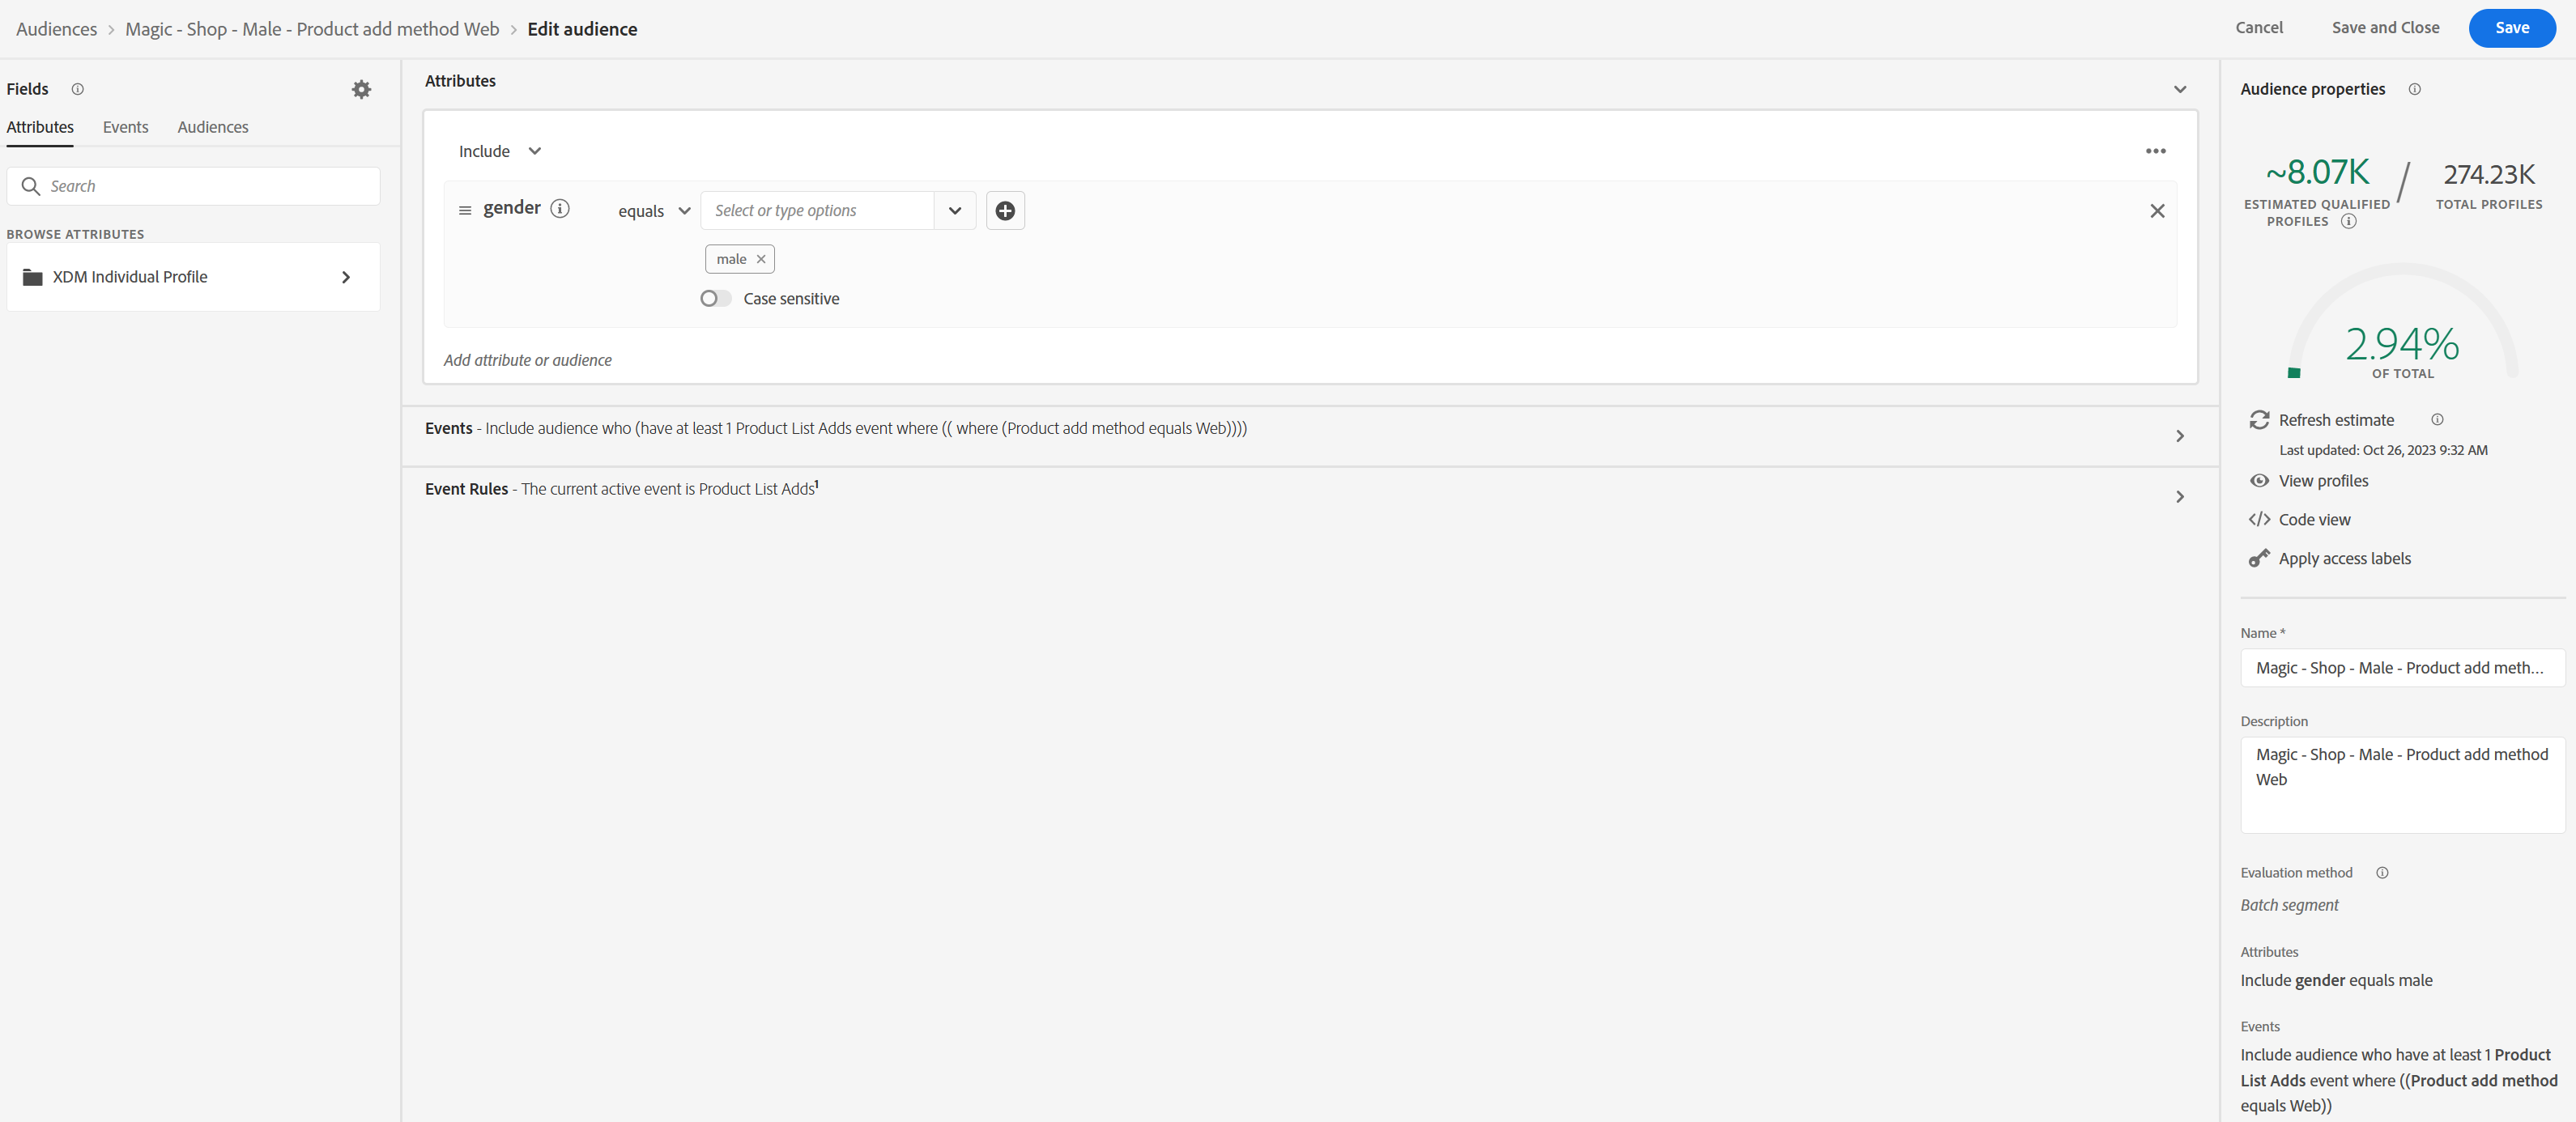
Drag and drop gender onto the rule builder. The gender attribute is added.
-
From the Select or type options drop-down menu, select male.
-
On the left pane, click the Events tab.
-
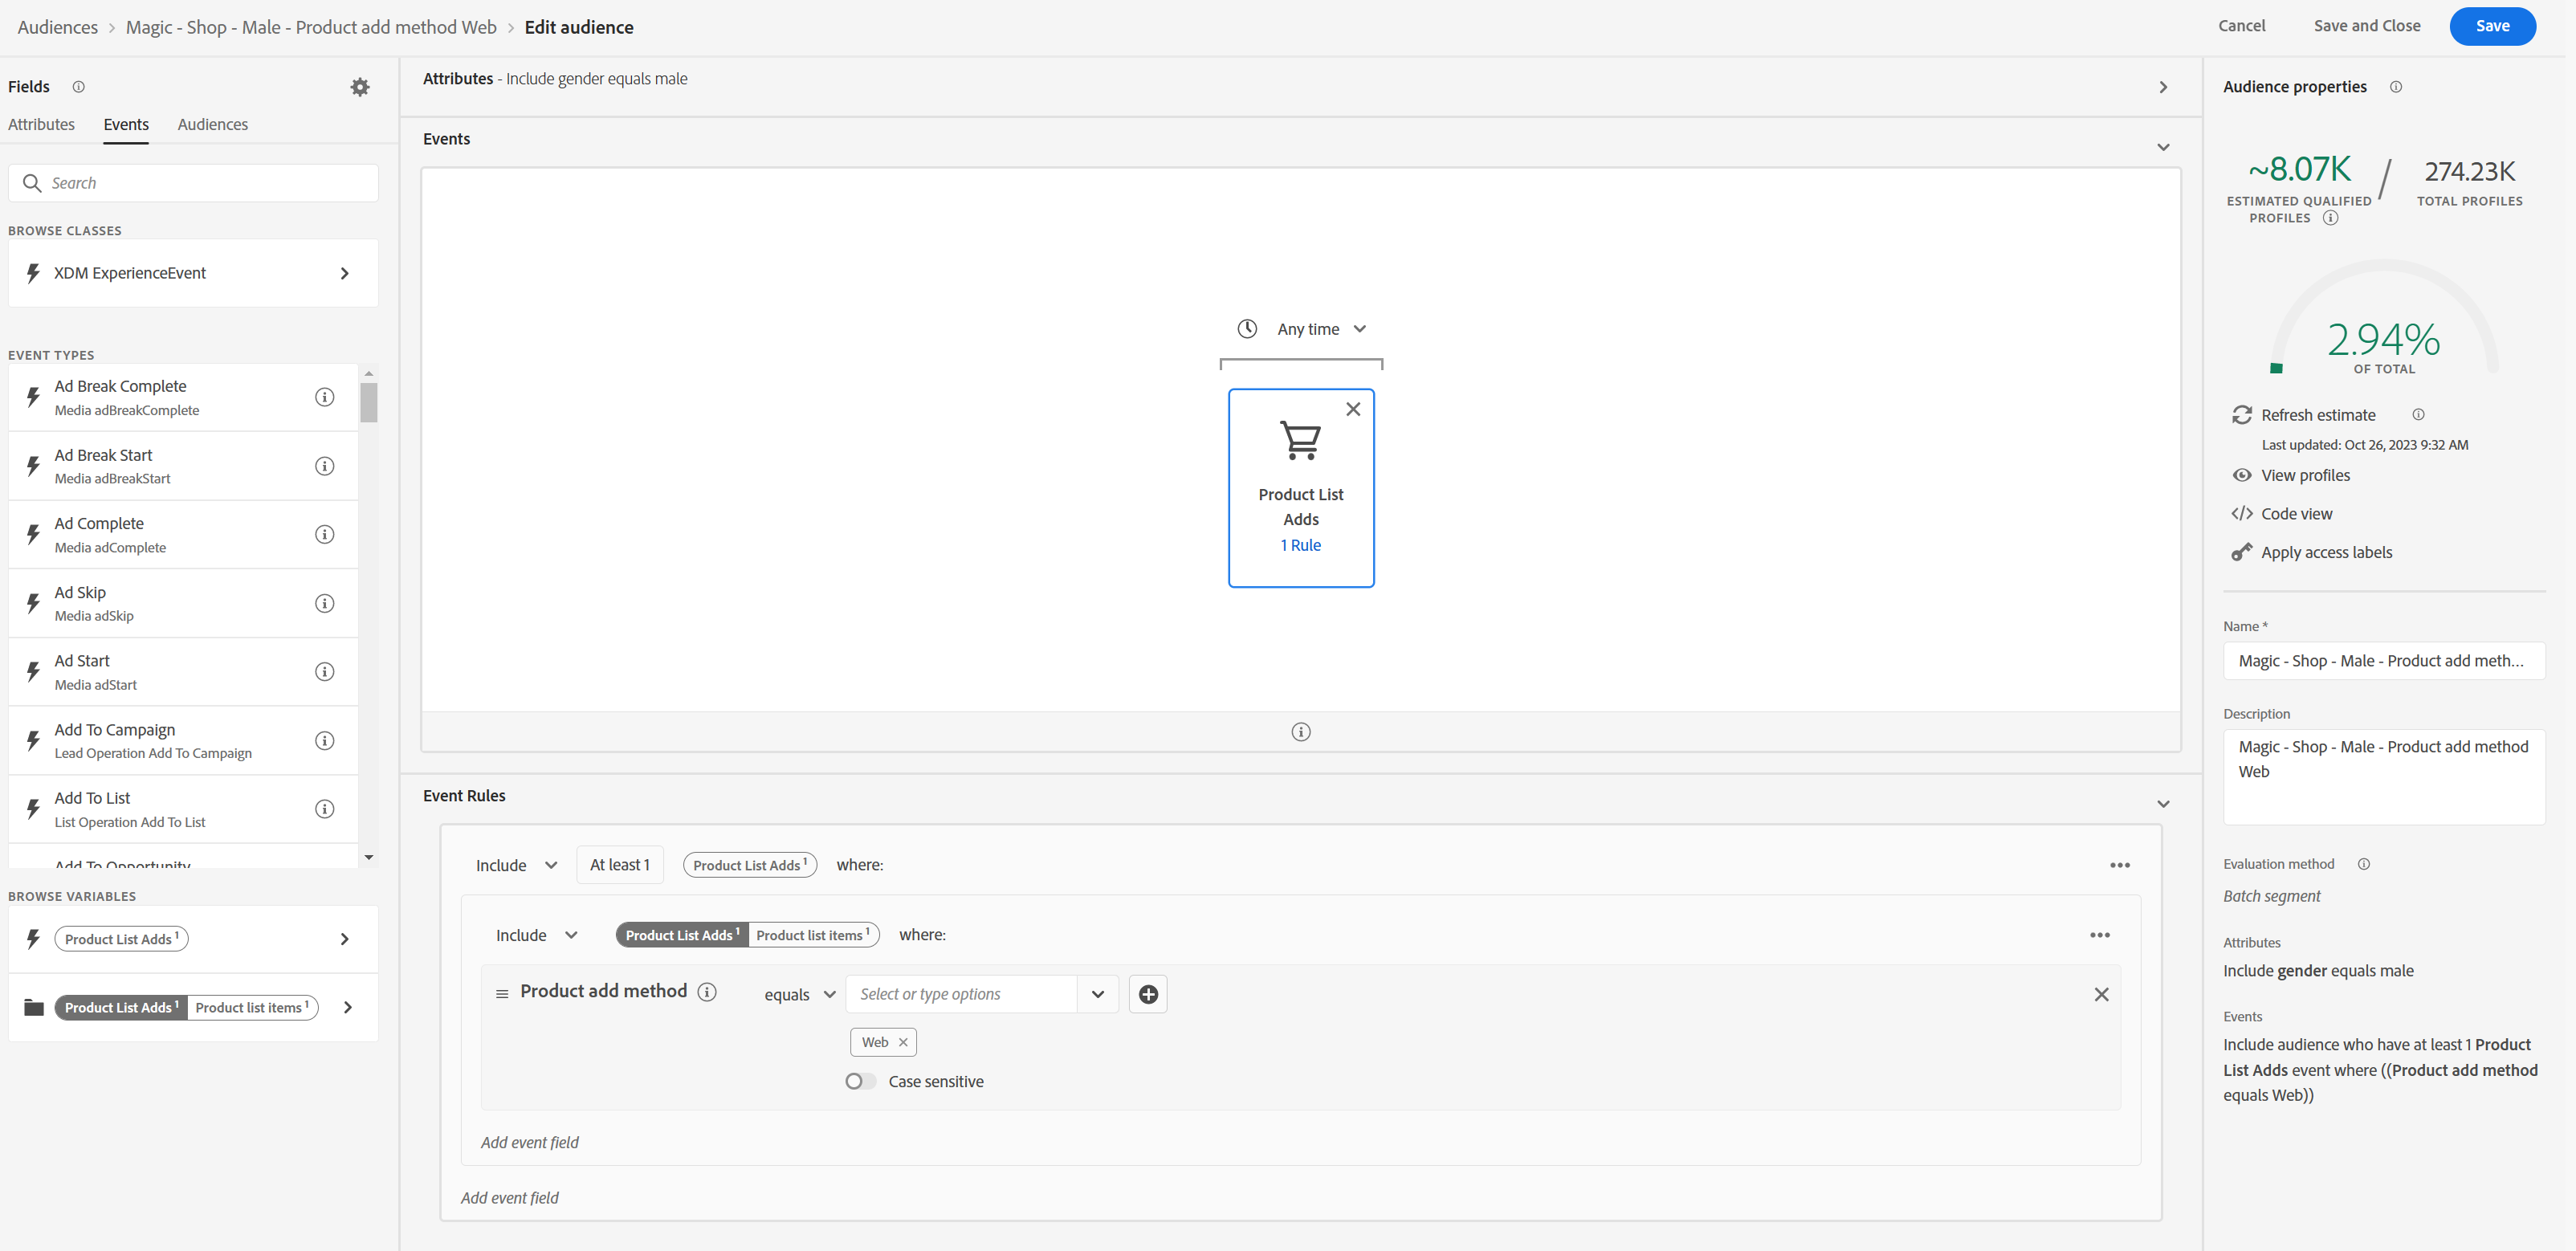
Under EVENT TYPES, look for Product List Adds and drag and drop into the rule builder.
-
Ensure Product List Adds you added now is selected. The Event Rules section is displayed at the bottom.
-
On the left pane, navigate to XDM ExperienceEvent > Product list items and drag and drop Product add method onto the Add event field section.
-
From the Select or type options drop-down menu, select Web.
-
In the Name box on the right pane, enter a suitable name such as Male - Product add method web.
-
Click Save to save the audience.
Create an Audience of Male Customers Who Added a Product Using Mobile Phones
-
Click Create audience. The Create audience dialog opens.
-
Ensure the Build rule audience creation method is selected and click Create. The rule builder is displayed.
-
On the left pane, ensure you are on the Attribute tab and navigate to XDM Individual Profile > Adlsplatform Individual recognition > Core
-
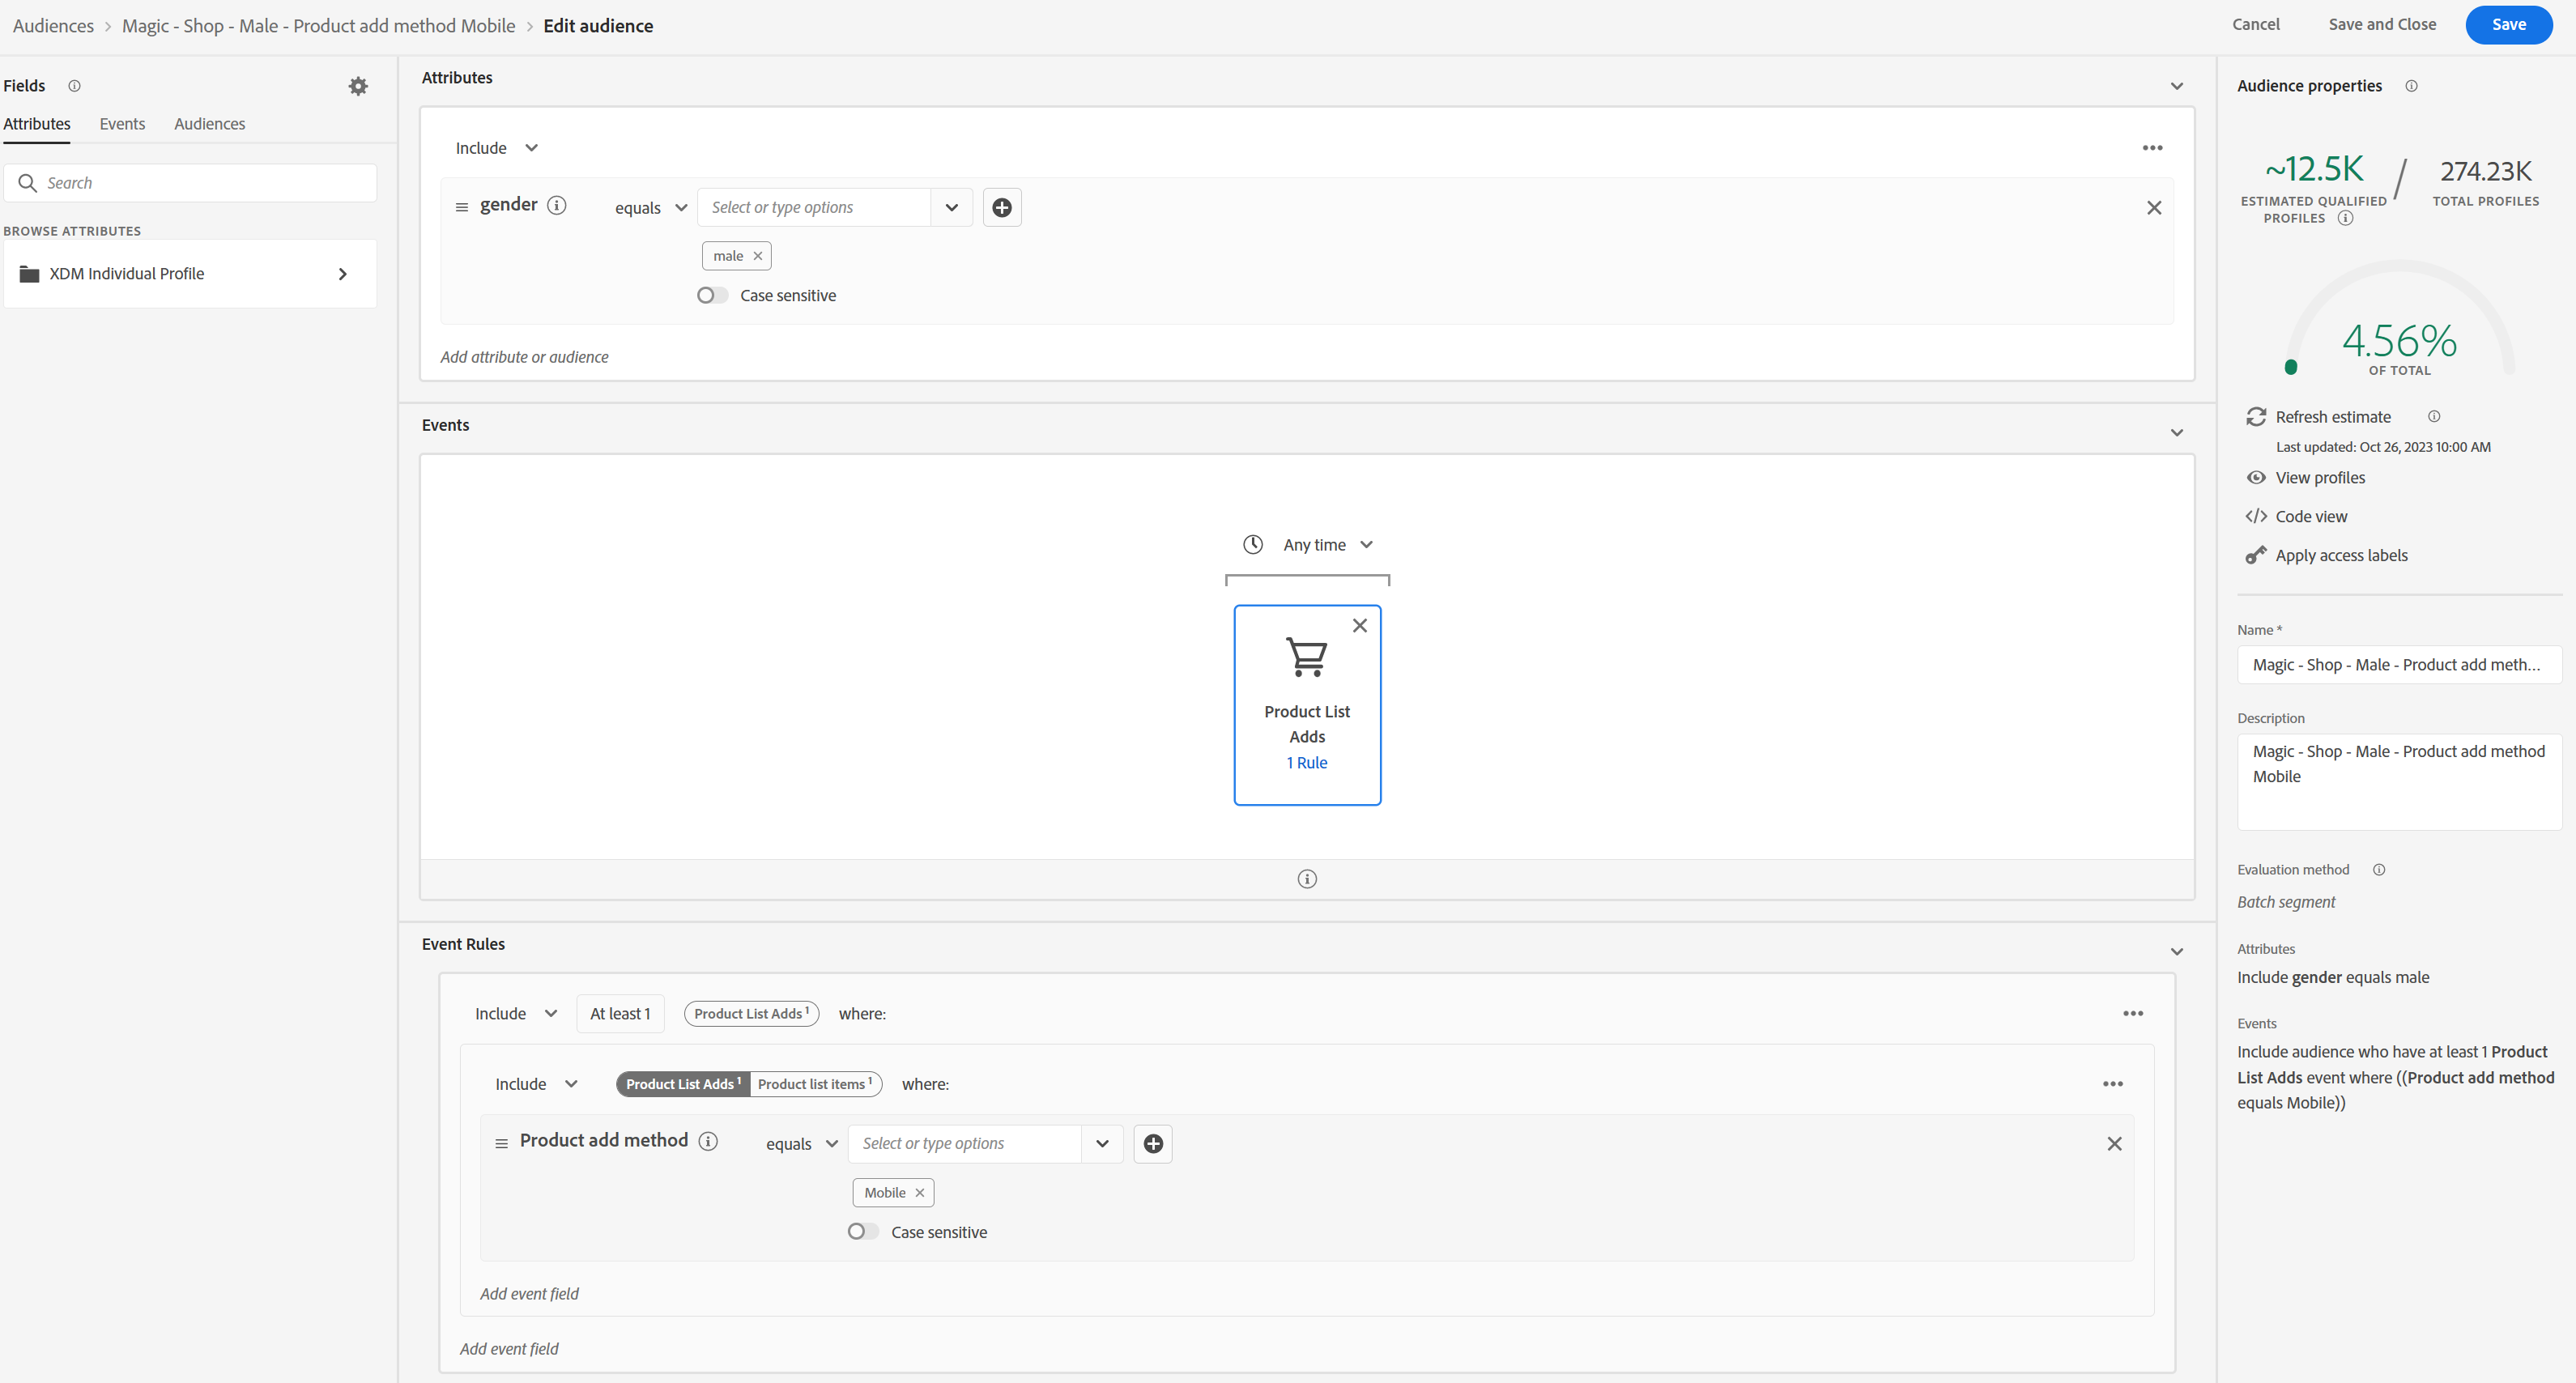
Drag and drop gender onto the rule builder. The gender attribute is added.
-
From the Select or type options drop-down menu, select male.
-
On the left pane, click the Events tab.
-
Under EVENT TYPES, look for Product List Adds and drag and drop into the rule builder.
-
Ensure Product List Adds you added now is selected. The Event Rules section is displayed at the bottom.
-
On the left pane, navigate to XDM ExperienceEvent > Product list items and drag and drop Product add method onto the Add event field section.
-
From the Select or type options drop-down menu, select Mobile.
-
In the Name box on the right pane, enter a suitable name such as Male - Product add method Mobile.
-
Click Save to save the audience.

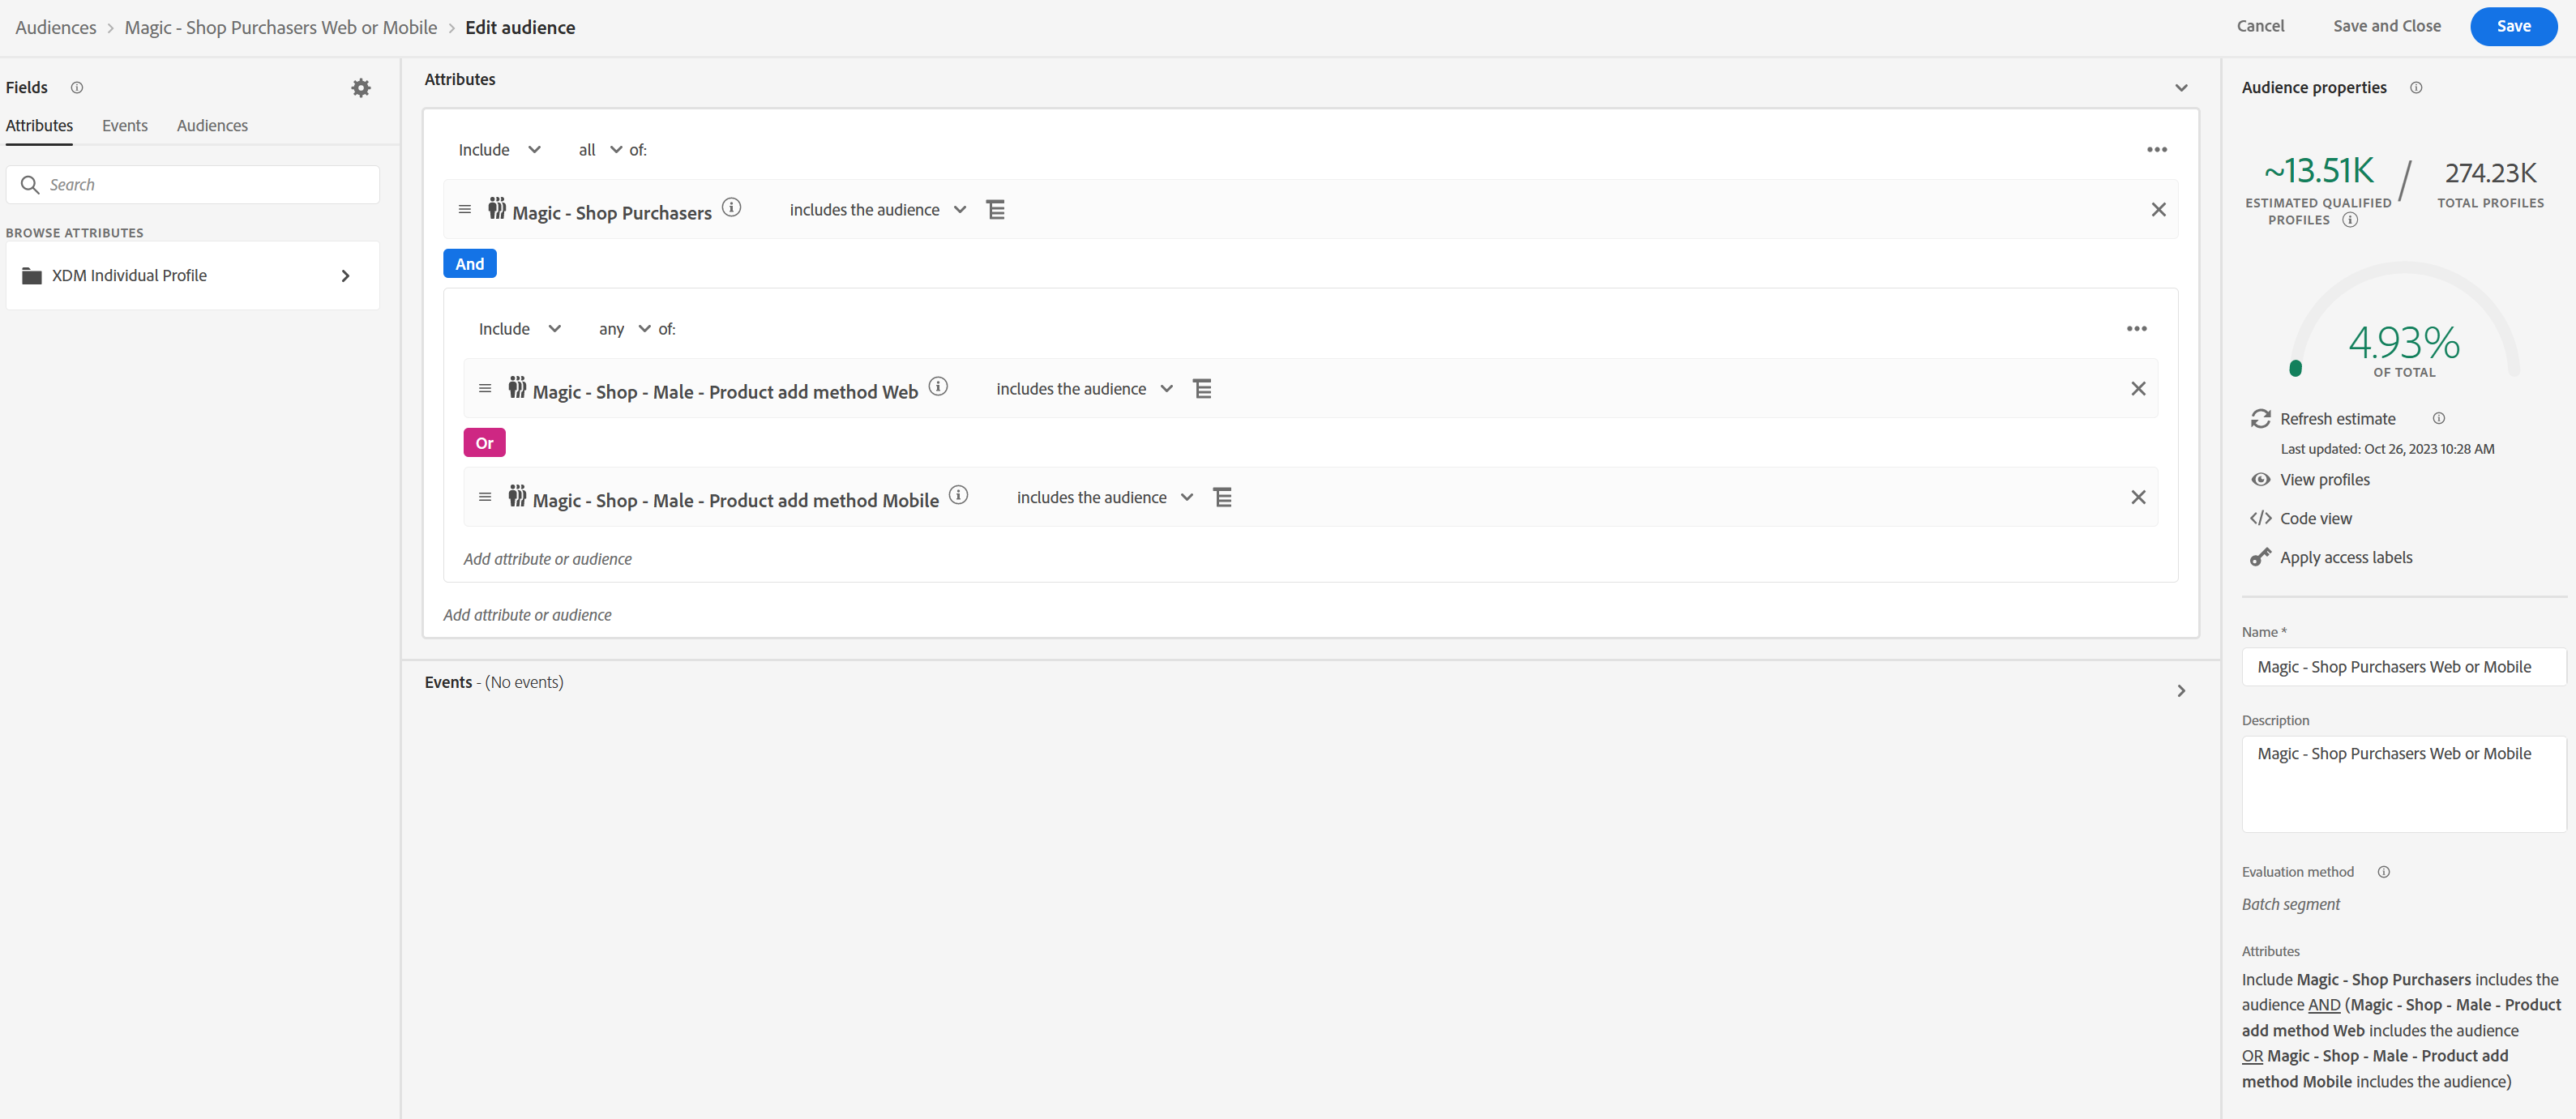
Create a New Audience of Male Purchasers Whose Product Add Method was Website or Mobile Phones
- Click Create audience. The Create audience dialog opens.
- Ensure the Build rule audience creation method is selected and click Create. The rule builder opens.
- On the left pane, click the Audiences tab. The available audiences are displayed.
- Click Experience Platform. The audiences you have created so far are displayed.
- Drag the Purchasers segment you created in Task 1 onto the rule builder. The attributes are updated.
- Click the ellipsis on the right, as shown, and click Add Container. A container is added with an Add operation.
- From the left pane, drag and drop the Male - Product add method web audience you created in Task 2 onto the Add attribute or audience section. The audience is updated in the container and a message indicating that the container must include at least 2 rules is displayed on the right.
- From the left pane, drag and drop the Male - Product add method Mobile audience you created in T ask 3 below the audience you added in the previous step.
- Click the And operator. Notice that it changes to Or. Now, you have created an audience of customers who have made a purchase and whose product add method is mobile or web. Similarly, you can create other audiences using the audiences you have already created, which saves you time and effort.
- On the right pane, in the Name box, type a name for the audience. For example, Project.
- Click Save to save the audience.
Activate the Audience to a Destination
- Ensure you are on the Browse tab of the Audiences page and click the your Project segment you created earlier. The your initials Project segment page opens.
- In the Activated destination section, click Activate to destination. The Activate destination page opens.
- In the Select destination section, select the Amazon S3 destination you configured earlier and click Next. The Scheduling section is displayed.
- In the Scheduling section, under SCHEDULE, click Create Schedule, a shown. The Scheduling your segment name dialog opens.
- Under Frequency, ensure Once is selected.
- Select a future date from the calendar.
- Click Create. The schedule is updated.
- Click Next. The Select attributes section is displayed.
- Retain the default attributes and click Next. The Review section is displayed.
- Review the details and click Finish.
