-
Ensure you are logged in to platform.adobe.com. The Home page opens.
-
On the top navigation bar, at the top- right of the Home page, verify that the correct training region is selected.
-
Ensure you are on the right sandbox provided to you by your Instructor.
-
On the left navigation pane, click CUSTOMER > Audiences. The Audiences page opens.
-
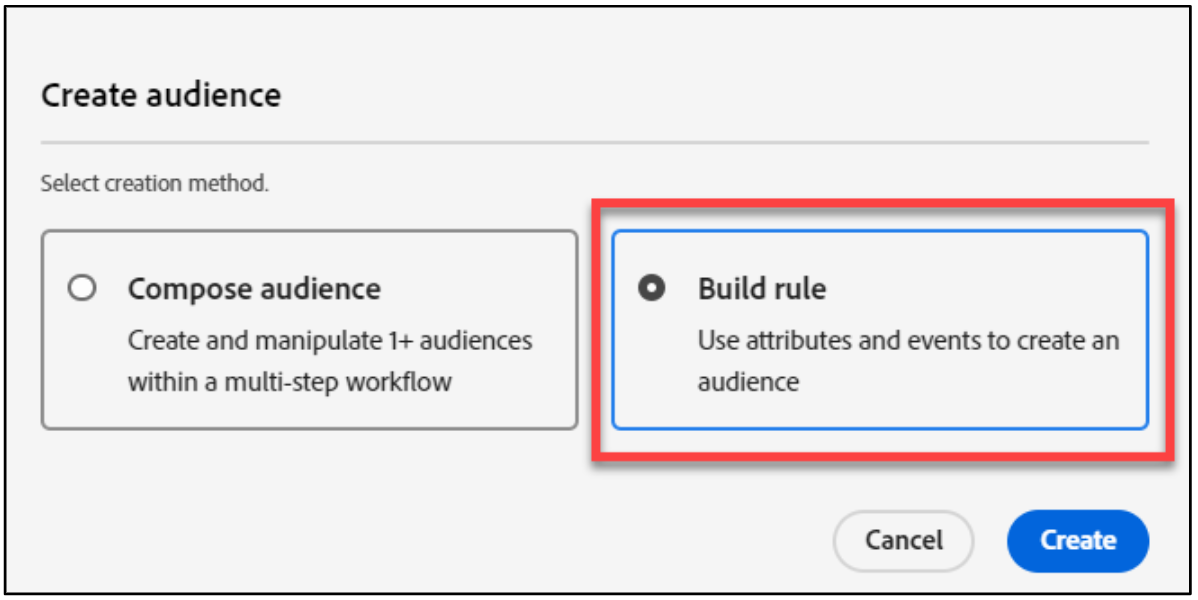
Click Create audience, as shown, to create a new audience. The Create audience dialog opens.

-
Select the Build rule creation method, as shown, and click Create.
-
On the left pane, under Fields, ensure you are on the Attributes tab.
-
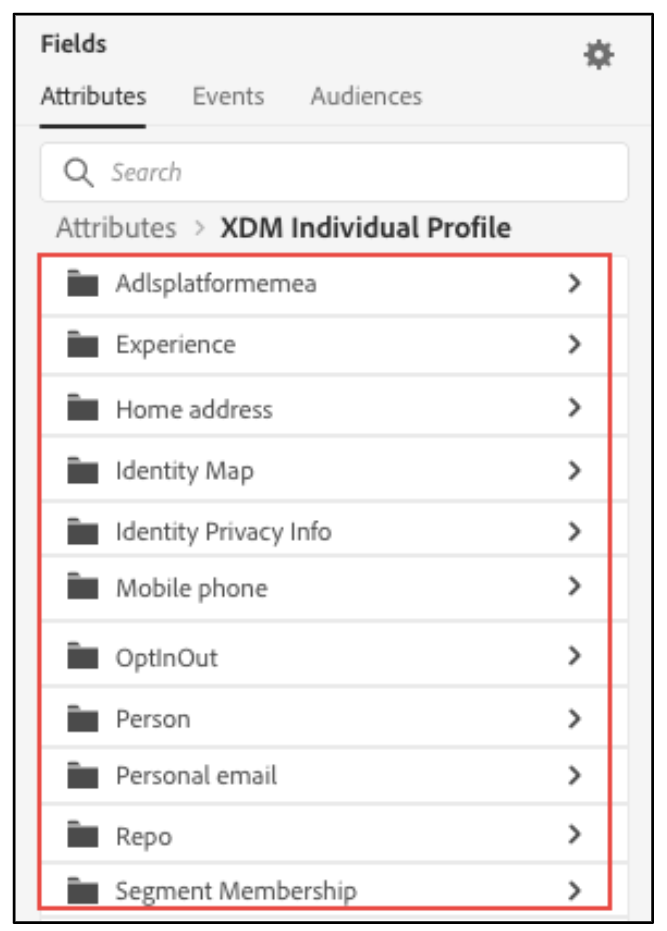
Under BROWSE ATTRIBUTES, click XDM Individual Profile. The available attributes for the XDMIndividual Profile attribute are listed, as shown:
-
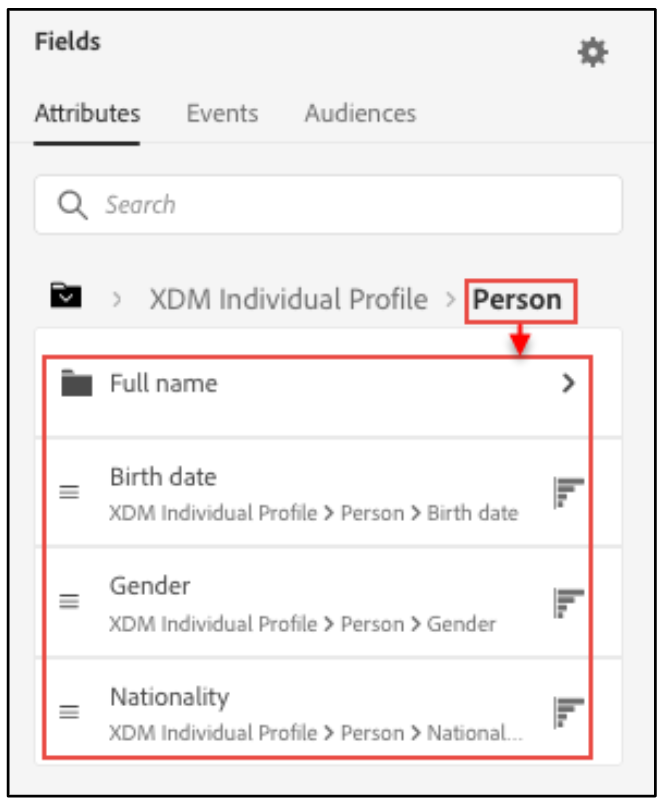
Click the Person folder. The fields under the Person folder are listed, as shown:
-
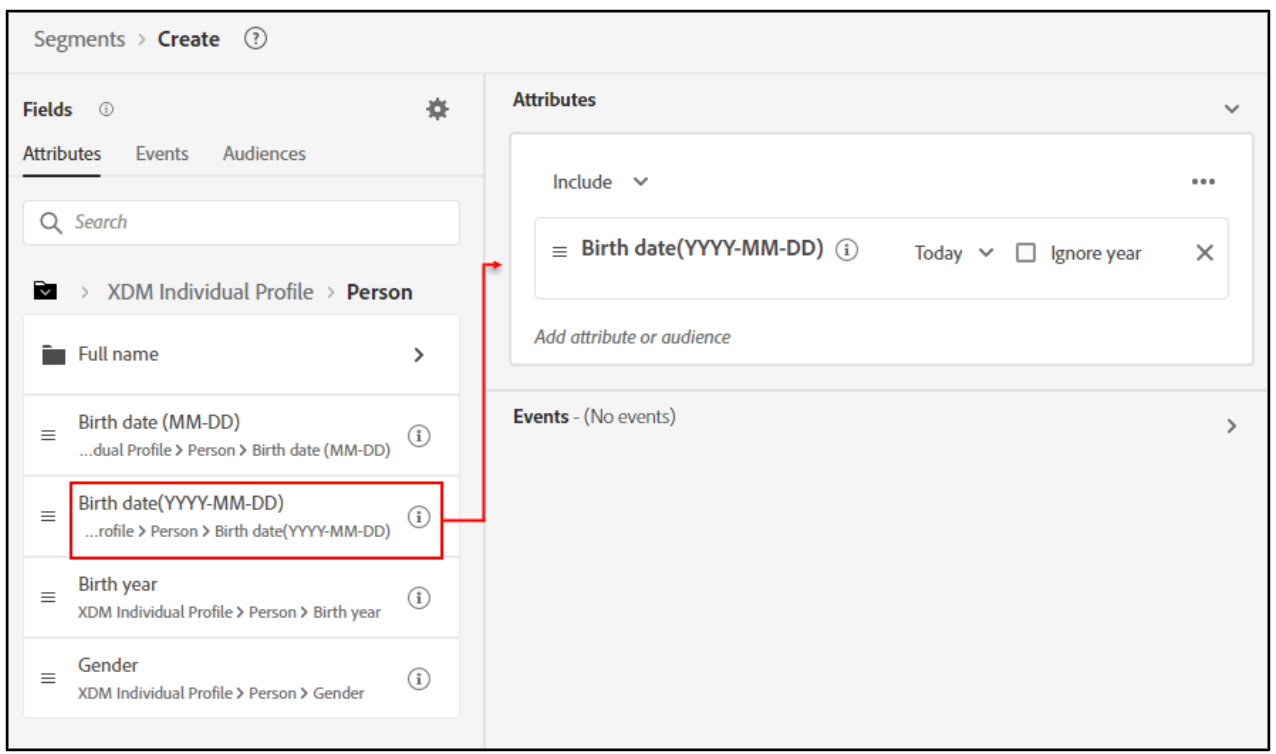
Select Birth date (YYYY-MM- DD) and drag it onto the rule builder canvas, as shown:
-
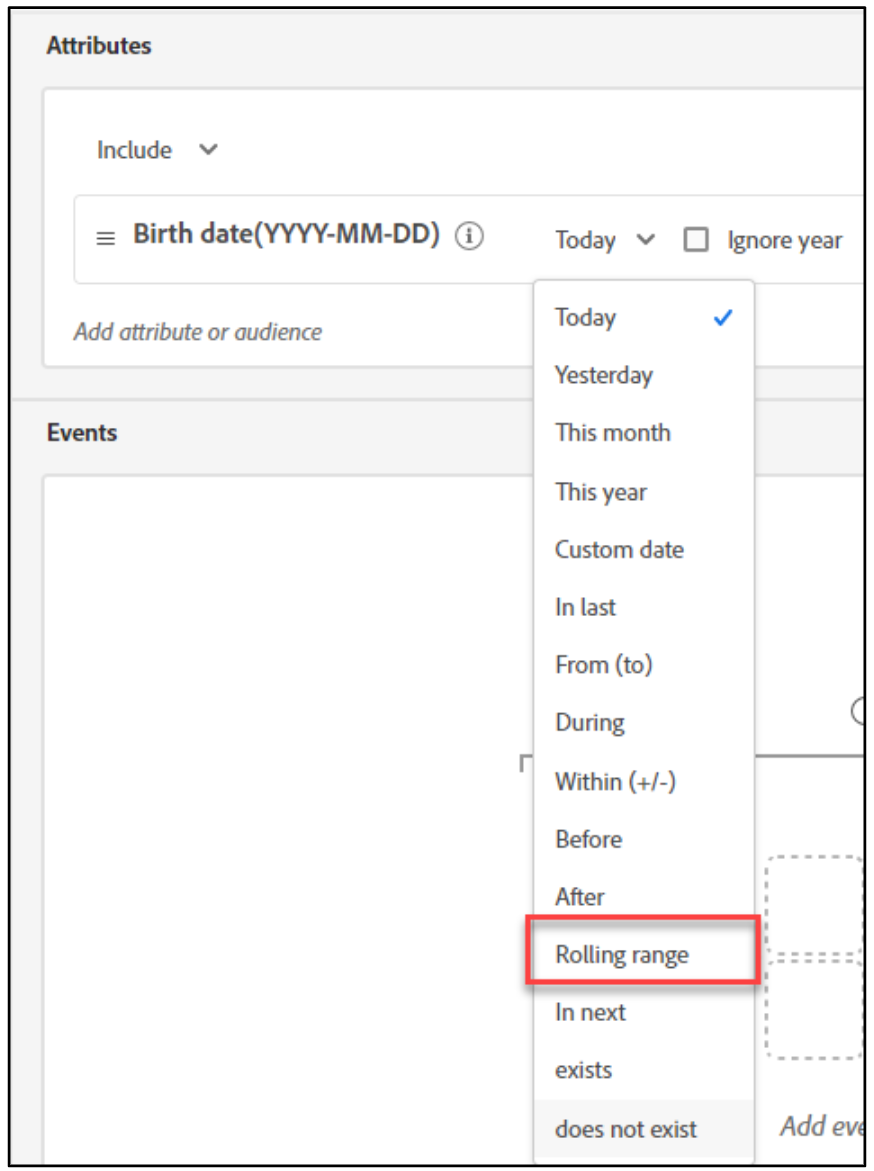
In the Attributes section, click the Today drop-down arrow and click Rolling range from the list that appears, as shown. A box appears pre populated with 1.
-
Click the Day(s) drop- down arrow and select Years.
-
Click the to link. A box appears pre populated with 2.
-
Enter 18 in the first box and 45 in the second (to) box. The attributes should now look, as show:

-
To include the customers who have email ID, ensure you are on the Fields > Attributes tab on the left pane.
-
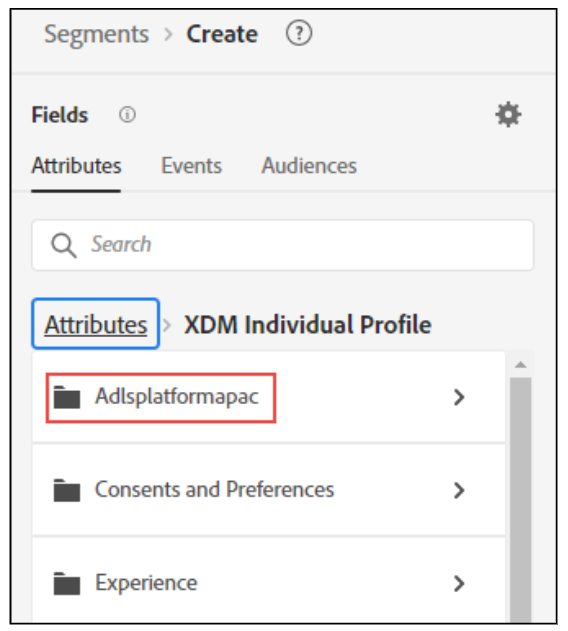
Click XDM Individual Profile. The available attributes are listed.
-
Click Adlsplatform folder. For example, Adlsplatformapac.
-
Navigate to Identification > core. All available fields under core are listed.
-
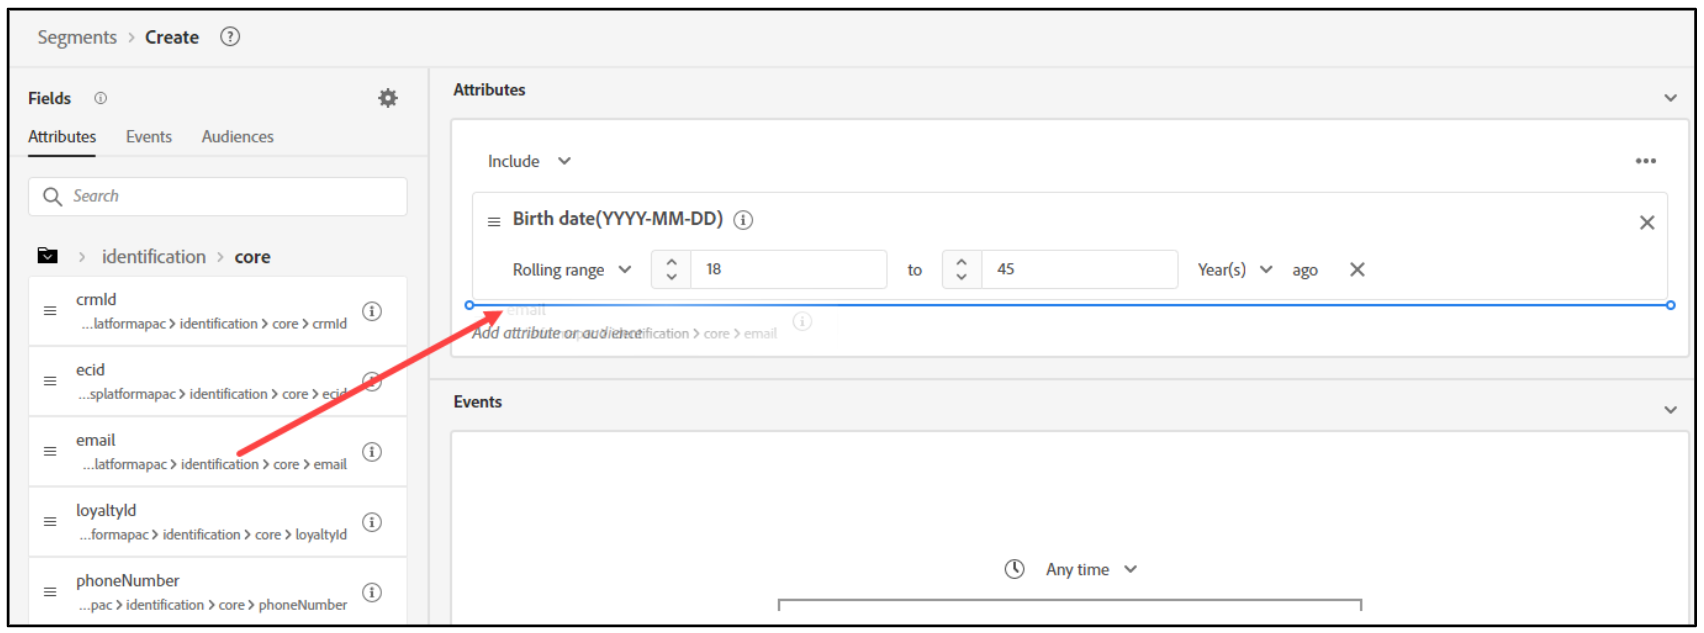
Drag email under the existing rule in the rule builder. While dragging, ensure the blue line appears under the existing, as shown.
Note that the AND operator appears connecting the email rule with birth date.
-
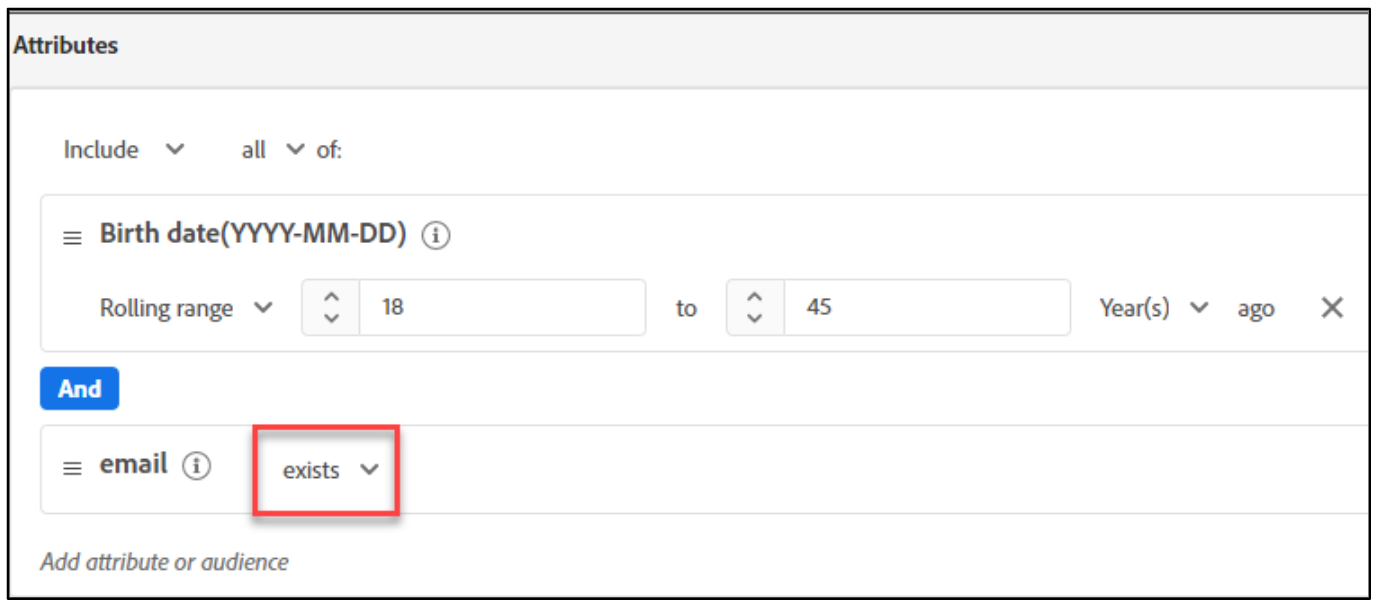
Click the equals operator drop-down arrow next to email and select exists. The rule builder should now look, as shown:
-
On the left menu, type loyalty in the search box. The fields associated with loyalty are listed. Being a custom field, the loyalty program data will be in a folder named with your tenant ID. For example, Adlsplatformapac.
-
Click the loyaltyDetails folder. The available options are listed.
-
Drag the level field onto the rule builder, under the email attribute you added earlier.
-
Click the select or type options drop- down arrow and click gold from the list. The gold status is added. The segment is now defined with the customers who have an emailID, are aged 18 – 45 years,and are a part of the gold membership, as shown:
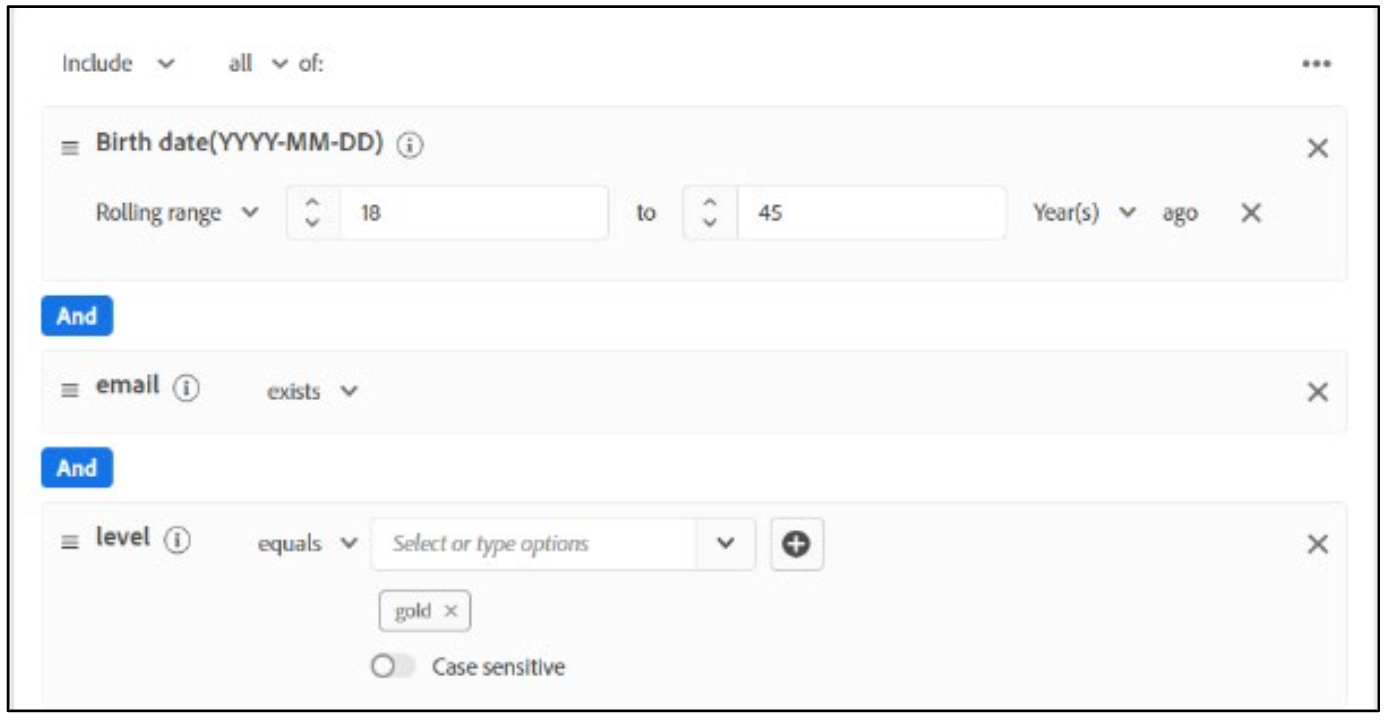
Note: You can select multiple values for loyalty status. As it is referenced as an enumeration in the XDM schema, the values are available from the Select or type options drop - down menu.
-
In the Audience properties pane on the right, click Refresh estimate. The estimated profile count is displayed. I t may take a few seconds to refresh the estimate
-
In the Name box, type Segment18 – 45GoldEmail.
-
Under Evaluation method, ensure Streaming is selected. If not, click the drop- down arrow and selectStreaming.
-
Click Save. A success message appears indicating the segment is saved.
-
Click Save and close. A summary of the newly created segment is displayed.
Note: T he summary also lists the sample profiles. You can click the profile IDs to view the details.
- Click Edit audience on the profile summary page.
- On the Audience properties pane, click Code view to view the segment definition for API. The code view is displayed, as shown schema.

- Click Cancel to return to the newly created segment page. Stay on this page for the next activity.
